
Tag: rock climbing

Learning from Near-Misses

Are the number of climbing accidents increasing?

Of course, the sheer volume of people involved in the activity of climbing will cause the number of incidents to rise. It is apparent however that many near-misses and incidents would not have occurred with slightly adjusted systems. The BMC recently launched an incident and near-miss reporting system – any themes that emerge will be published in a summary report.

A few years ago, in response to an increase of near-misses and accidents at the crag, I found it necessary to produce a standard operating procedure for Rock and Sun Ltd. Interestingly, this document only applies to sport climbing. The UK system of teaching trad climbing is well-established, and the client usually arrives without the necessary skills to perform the activity and therefore is immediately open to learning. This is not necessarily the case with sport climbing, as most of the necessary skills can be practiced indoors.


Modern climbers less prepared for outdoor risk assessment?

Indoor gyms eliminate as much risk as possible, and rightly so for a professionally managed facility. Routes are well-bolted with clear fall zones. When indoor climbers make the transition to an outdoor environment the extra risks may not be obvious to all.

Climbers often arrive on our climbing trips having climbed 2 to 4 years indoors and already able to climb 6b+ or even 6c. Having practiced in a relatively safe environment can create a mismatch between the “hard skill” of the actual climbing and the “soft skills” of route finding, risk assessment and decision making. This mismatch can easily put a climber at risk, as it can be difficult to engage with softer skills when their (indoor) experience may point towards those skills being unnecessary.

I’ve certainly noticed that it has become more difficult to persuade an ever-greater number of clients to pay enough attention to safety while sport climbing.

A compounding factor is that people have become less capable of assessing and managing risk, as children and young adults have fewer opportunities to play and learn in an outdoor environment. This can lead to excessive or inappropriate risk-taking or to being overly cautious or nervous. Our client group is changing; they are not necessarily outdoorsy people. Many would not have chosen to become climbers had they not had the opportunity to learn in an indoor environment. To them the outdoor environment itself can present some challenges of its own. This is often displayed in having difficulty walking on uneven ground, struggling with the concept of going to the toilet outside, or not realising warm layers and waterproofs can be necessary in all climates.

Some typical examples of people’s inability to accurately assess risks, are:

  • Climber’s feet are at 1.5m from the ground, the first bolt is clipped and is about 2.5m (around chest height) and 1m to the right of the climber. Climber is about to move up and left. Question posed: look at where the bolt is and how much rope will be in the system if you move further away and then fall? Answer: I will swing down to the right – pointing in a diagonal line. Response: I remind them that when Newton invented gravity he designed it to pull you in a downward direction and that you will only start swinging after the rope is being weighted. In this case the climber would hit the ground without weighting the rope.

This is a familiar scenario, even after the preliminary training that happens at the start of a trip. We consistently teach people to read the rock when route finding: go where it is “less steep and more featured”, and before heading off on the chosen route to consider the prospect of a fall. If the fall is not safe or if they are in doubt, they should stay closer to the bolt even if the climbing is harder. It is apparent that many people are unable to assess the fall zone and struggle with visualising the physics involved. These awarenesses are not inherent and need to be learned.  

  • On reaching the anchor after top-roping a diagonal line the climber tries to pull up rope. The anchor is out of sight so, as is standard, the rope is kept tight so that unclipping the anchor is not possible. I shout: why do you need slack? It is quiet for a few seconds then I hear: ok, lower. The client standing next to me while I belay asks what was happening and I explain that he was attempting to unclip from the anchor. She was horrified and expressed her surprise: how could anyone be so stupid! She then climbs, unclipping the draws as she goes. On reaching the anchor, she attempts to pull rope up. It is quiet for a second, then I hear “doh! Ok lower”.

This is a good example of how easy it is to not be doing a continual risk assessment every time we unclip our rope. At least 15 of our clients each year try to unclip themselves from the anchor after top roping and I know of several fatalities from this.

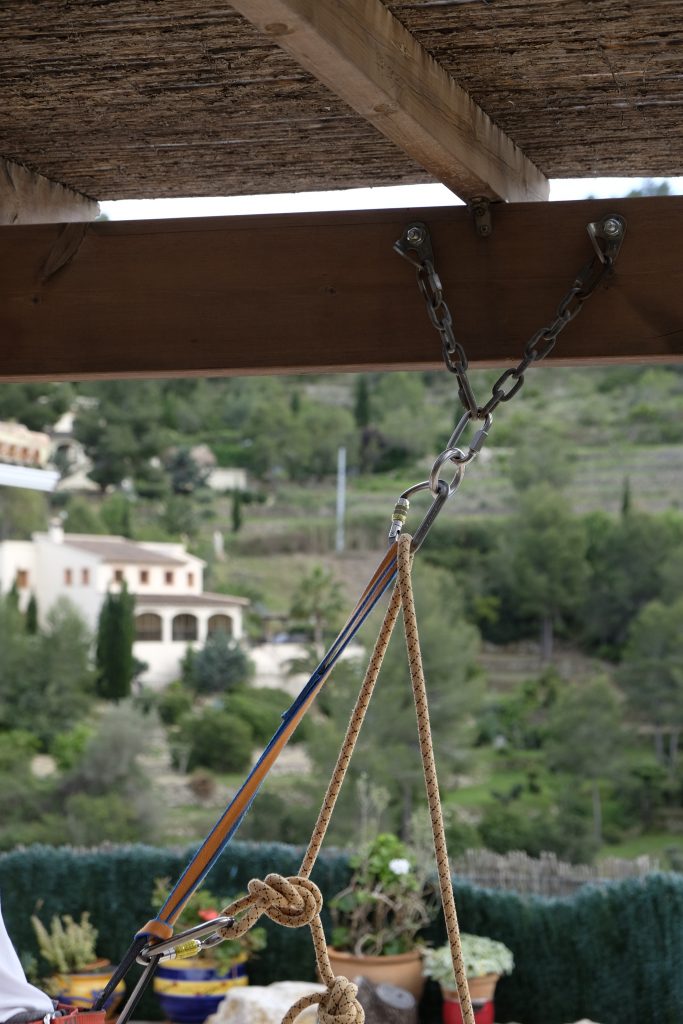
The fix is of course to always look at and assess what you are unclipping but using a locking karabiner and a quickdraw instead of two quickdraws on the anchor gives the climber something more difficult to unclip and allows time to think as well as a physical prompt that “this one is different”. This system provides something quick to clip into for a leader and ensures that anyone top roping cannot quickly unclip from the anchor. And of course, the rope should always be tight when the climber is out of sight and near the anchor.

  • When the first bolt is high, our standard practice is to have the rope preclipped for each leader. In this case, the climber pulled the rope down on several occasions over a couple of days. I spot this on each occasion and climb up to reclip the draw. Words are had! The following day, the same climber again pulls rope through first draw at 3m. This time I fail to spot this. He breaks a foothold while trying to clip the first draw and breaks his foot. Cause: Climber not equipped to assess the quality of the rock or the likelihood of falling off before the first clip.


Experience: Worst or Only teacher?

A friend of mine who runs an activity centre likes to say: “experience is the worst teacher”. Meaning that when we do something repetitively and the outcome is always positive, we can become complacent and neglect to assess the risk (same activity different setting). I understand that this sometimes catches people out, but I also think: “experience is the only teacher”.

I often think of a young trainee instructor of mine recounting a story of his near-death experience while out climbing with friends at a sea cliff in Pembrokeshire. He had decided to solo the last route of the day, only HS (well within his grade) while the other two rope climbed out. Near the top of the climb (about 90ft) and in the middle of the crux, he felt the rope he had tied onto this back (my rope by the way) untying from his waist. Realising that he was in no position to stop and re-tie he decided to climb carefully, hoping that the rope would not slip from his shoulders before reaching the top. Just as he felt the rope slip a little more, he looked down and realised that the rope would probably bounce off the ledge below and into the sea, as would he. The rope slipped, he instinctively let go of the rock with one hand to hold the rope. This caused him to barn door. He held the swing as his life flashed before his eyes. The next words he heard in his head was my voice telling him “I told you so”.

A few weeks before during a training session with the group of trainee instructors we had had a conversation about soloing. It was apparent to me that a certain individual was overly confident in his abilities and would come unstuck if not careful. I made the point that a great deal of climbing experience with a rope is necessary before even considering climbing without. The grade is not so much the issue, it is the unexpected things that can throw you off.


Common Mistakes leading to Improved Systems

“Everything that happens once can never happen twice. But everything that happens twice will surely happen a third time.” A quote attributed to the Brazilian author Paulo Coelho but I think is originally an Arabian proverb.
As instructors we’re in the risk management business. It is impossible to remove risk completely in an adventurous activity and to do so would be detrimental to the experience. Where you can predict however that an incident will occur and there is an easy fix to avoid it, it would seem prudent to do so.

The following are example of changes that I’ve made both personally and for those that I teach:


  1. Swapping the quickdraw below the anchor onto belayer’s rope.

This can fix any mistake made while threading as long as the rope is still attached to the harness.

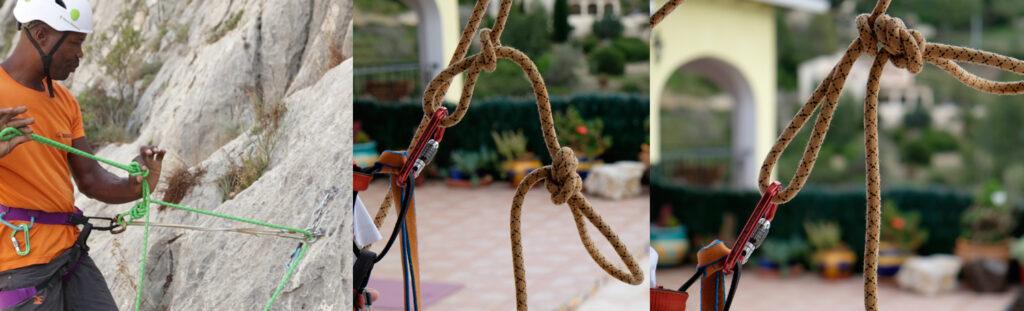
A good friend of mine with over 40 years of climbing experience recently made a mistake while cleaning a sport anchor that could have easily proven fatal but would not have been an issue if he was using the system that we insist our clients use. The mistake is common but is only usually a serious issue if having climbed the route on top rope: The climber passes the rope through the screw gate on their cows’ tail but fails to thread the anchor itself (see photo). If they then unclip their sling from the anchor without first testing the system there is nothing between them and the ground. I’ve witnessed this near-miss a few times. In one case the climber was desperately holding onto the anchor while the belayer was taking tight. With the rope pulling directly on the climber’s harness the climber shouted “no”, but the belayer was unable to work out what the problem was so kept taking in.

mistake: threading own screwgate instead of anchor
The climber made the mistake of threading their own screwgate instead of the anchor. Testing the system before unclipping the sling from the anchor, and swapping the last quickdraw onto the belayer’s rope prevent this mistake from being fatal. (photo taken at home because of Covid-19 lockdown restrictions)


  1. Tying a knot in the end of the rope close to the screwgate when cleaning anchors.

Client is being lowered from 30m and is around 5m from the ground when looking at the knot attached to the screw gate. Then, with a certain amount of alarm, says: “that doesn’t look right”. I figure there’s not much to be done but to continue to lower. On reaching the ground it’s immediately obvious that the client had tied a slip knot rather than a figure of eight or overhand on the bight. The client casually asks “what should I have done differently?” I offer a few expletives followed by “paid attention”! Clearly, they knew the knot was incorrectly tied as soon as they looked at it but had not bothered to check it after clipping to the screw gate and before trusting their life to it. Although I would hope to not to see this near-miss again the fix for this is a simple one that I now incorporate into my own threading system and fondly call it the “idiot knot”. It’s simply an overhand on a bight tied next to the screw gate to prevent the end slipping through (see photos or watch this video).

Threading anchors - Idiot knot
Left: Climber backs up his overhand knot with an idiot knot. Middle: Climber makes mistake of tying a slip knot, but backs it up with an idiot knot. Right: The slip knot only slips until the idiot knot, so a near-miss is prevented. (The middle and right photo taken at home because of Covid-19 lockdown restrictions)


  1. Keeping a small Screwgate on Belay Loop as part of the cleaning set up.

This addresses two potential errors: (1) Attaching the rope to gear loop instead of belay loop.  (2) Dropping the screwgate when moving it to the belay loop (problematic if you only know one method of threading). Watch this video.

After a couple days of making clear to the most experienced climber in the group that I was uncomfortable with him carrying the screw gate on his gear loop, because of the risk of clipping into this non-load-bearing part of the harness by mistake, he made it clear that this would be ridiculous. Next day, the client is threading an anchor 20m up while I’m lowering from a 40m pitch next to him. As I pass, I ask my belayer to stop lowering so that I can point out to the client that he threaded the anchor and attached the rope to his gear loop. He needed a near-miss to be persuaded to adopt our system.


Conclusion

As instructors we use our experience to make judgement calls. Systems that we have in place are built upon years of gained knowledge and experience.

While it is understandable that we all have different experience levels with making risk assessments and that each of us might assess risk or hazard differently, it is important to acknowledge that in our profession risk is always present and it is our job to reduce it as much as is reasonably possible.

During the past few years I’ve learned that at certain moments any of us are able to make mistakes that we would not normally think of as likely or even possible. It really doesn’t matter how long you’ve been climbing or how safety conscious or aware you might think you are, building some safety backups into your systems could just save your life someday. We can all make mistakes! Allow yourself to be open to adjusting your system based on your own or other’s experiences.

Published in Professional Mountaineer, Summer 2020

text: Trevor Massiah

The following blog describes more Common Mistakes and Improved systems


The Art of Redpointing

The Art of Redpointing

Climbing magazines, climbing videos on YouTube and climbers’ posts on social media are predominantly focused on redpoint ascents. The hardest routes in the world are redpoints, such as “La Dura Dura” (9B+/5.15c) sent by Adam Ondra as well as Chris Sharma in 2013, and “Silence” the first route of its grade (9C/5.15d) sent by Adam Ondra in 2017.

Redpointing is crucial to develop as a climber. It raises your overall climbing standard and allows you to climb much harder than when onsighting. This blog exlains how redpointing provides opportunities for learning and growth. It also describes what can be considered an effective redpointing process.


What is Redpointing?

Redpointing is lead climbing a route without falling or resting on the rope, having previously tried and failed to climb the route cleanly, either on toprope or lead. Before the successful redpoint, this process is also referred to as ‘projecting’, or trying a project.

The term redpointing originates from the mid 1970s, when German climber Kurt Albert recognised the potential of free climbing (as opposed to ‘aid climbing’) and started to free climb in his local area, the Frankenjura. While he was attempting to climb the route free, he would paint a red X on the rock near the pitons when he no longer needed these as aids, as handholds or footholds. Once he was able to climb the whole route without using any of the pitons, he would paint a red dot at the base of the route, to mark that he had achieved his goal of free climbing the route. This rot-punkt was translated to red-pointing. The concept of redpointing (as in: free climbing, not the idea of painting red dots on the rock) became very popular in the 1980s and 1990s with the increase of sport climbing worldwide.

Trevor Massiah climbing Morgan (7B+), Sikati Cave, Kalymnos, Greece (2017).


Some climbers never redpoint

Redpointing has become the most popular way to sport climb as people recognize its usefulness in raising their standards. That said, we work with hundreds of climbers a year and quite a few of them say they have never had a project, and never enter into a redpointing process. Instead, they choose to mainly focus on onsighting, which can be great (see our blog “How to improve your Onsight grade”), but in our opinion onsighting will inevitably result in the need for redpointing. If climbers pick the right challenge for themselves when aiming to onsight a route, then they will at some point fail their onsight. Rather than walking away and trying another route, this should be seen as a crucial opportunity for learning and improvement.

There are some good reasons (or excuses) to not enter into red-pointing. Climbers associate it with a fear of falling (and they will generally make more ‘air miles’ while redpointing than when onsighting). Redpointing can also be associated with a sense of failing, as by definition you are not getting to the top in one go. Also, redpointing can be mentally, emotionally and physically exhausting. If not careful, it may result in disappointment, frustration, dissatisfaction and/or tears. Many climbers therefore prefer onsighting: they would be less likely to fall (i.e. they experience less or no fear), and they get to the top in one go (i.e. they get the immediate reward).

So although onsighting is fun and probably the best thing to do when on a short climbing break in an area where you haven’t climbed much before, there are a lot of climbers out there, who just always try to onsight, and don’t ever allow themselves to redpoint – even if it is just turning a failed onsight into success by climbing it a 2nd or 3rd time.

The short-term gains and rewards of only ever onsighting don’t outweigh the long-term losses. What I mean is that by only onsighting climbers are not allowing themselves to get the most out of their climbing potential. They haven’t explored their limits. They are staying within the boundary of their ‘onsight-grade’.

Sport Climbing Holiday Costa Blanca Desiree Verbeek_DSF4404
Desiree Verbeek sending her project Memoria de Pez (7A+/7B) Tarbena, Costa Blanca (2018).


Why red point?

Redpointing should be part of everyone’s training. It is not something that is only for ‘good’ climbers. Every climber, beginner or advanced, can use redpointing to push their limits and increase their standards.

I differentiate here between a quick redpoint (about 3 attempts), and a longer redpoint process where you have chosen a proper project.

A quick redpoint should at least be done occasionally, after a failed onsight. Trying the route a second or third time, means you give yourself the opportunity to turn ‘failure’ into ‘success’. You will learn from whatever mistake you made on your first attempt; maybe you went the wrong way, maybe you ended up wrong-handed, maybe you missed a rest. Entering into a redpointing process, and spending more time on finding the correct route, or figuring out a specific crux sequence, means you will improve your route-finding skills as well as your problem-solving skills.

Redpointing a route that is significantly harder than anything you have climbed before comes with even more advantages. When I first try a route like this, thoughts enter my head such as ‘this is way out of my league’, ‘this is just impossible’, ‘I will never be able to climb this’, ‘this route is Chinese to me – I don’t understand any of it’. It is a very fulfilling process to slowly, step by step figure out how to climb it and turning the impossible into the possible.

When sending your project, it is very well possible that you won’t just do it by the skin of their teeth; it may well feel relatively easy! This is because during all those climbing sessions you got to know the route in a much more intimate way, and you figured out how to climb this route in the very best way, knowing that you need to get everything right in order for you to be able to climb this. You are increasing your movement repertoire (i.e. your personal ‘dictionary of moves’) and by doing these same moves over and over again, you are perfecting them and building muscle memory.

When you are sending the route it may feel like (and/or look like to other people at the crag) a dance up the rock. You are climbing the route with style, with poise, in a state of flow. Even though the route was too hard to start with, and didn’t allow you to get into a rhythm, once your technical ability and knowledge of the route matches the challenge of your project, you are likely to experience the well sought-after flow experience.

Entering into a long and demanding and challenging process also provides the opportunity to deal with failure. If you’re not falling, you’re not trying hard enough. If you want to get close to the best you can be, then climbing is largely about failure. You will fail more often than you succeed and you may as well (learn to) enjoy this process. Redpointing is a good way to get used to collecting more failures than successes. Plus, that one-time success makes up for all the failed attempts before it.

It also helps to redefine failure and success; failure is not having tried your best and/or not enjoyed your day, and success is having tried your best and/or being happy. Climbing is much more than touching the chains. Spending time outside, climbing and trying hard, falling off, solving the puzzle bit by bit (or even seemingly making no progress at all), sharing beta, and hanging out with your mates all make for positive climbing experiences.

Paul Cooke climbing “Johann” 6A+ on Lao Liang, Thailand (2017)


An effective redpointing process

  1. It all starts with picking the right route. To ensure you set yourself the right challenge it would be a minimum of two grades above your usual onsight grade. Another thing to consider is the location of your project; it is more convenient to have a project close to home or in an area that you can go to at least a few times a year. When the gaps in between ‘tries’ are too big, you are more likely to lose progress made in the previous session. Thirdly, a route with good conditions would be ideal; for instance in the Costa Blanca it is nicer to have a project with afternoon shade than one with morning shade, because by the time you have warmed up your project could be in the sun (climbing in the sun is not conducive for good results most of the year in Spain). Last but certainly not least, pick a route that grabs your attention. An outstanding line or feature. A route that you really want to climb. A route that you don’t mind doing over and over, because you just love the moves on it.
  2. Start climbing the route from bolt to bolt. If you can’t do a section in between bolts – or simply if you want to speed up the process and not waste too much energy, use a stick clip to clip the next bolt. In most cases, you can stick clip the whole route. Sometimes this may not be possible if the route goes over a bulge, or if a bolt is awkwardly placed and doesn’t allow the stick clip to get in. You can also use a stiff clip or panic draw to make it easier to clip the next bolt.
  3. Now you have the rope up, toproping the route can be useful. You need to be careful though not to overdo it. You will need to understand the clipping positions and how exposed the gaps between the bolts may feel when on lead.
  4. Lead the route bolt to bolt. Try to solve the puzzle section by section. When clipping the bolt, don’t say tight and wait for your belayer to take in. Instead, clip and let go (providing the fall is safe of course). This conserves energy rather than waiting for the rope to be taken in, and it is a useful falling practice at the same time.
  5. While bolt-to-bolting, avoid the temptation to do the easier sections too quickly, because in the end all energy saved lower down will help you in the crux. Work the route and its rests until it feels absolutely right for your body/physique, until you’ve ironed out all inefficient moves.
  6. Make sure to also repeat the section from the last bolt to the anchor! It is a common mistake people make to bolt-to-bolt every section many times, but then only do the finish once or twice, because they’re at the anchor now and think the bolt-to-bolting is finished. It is important to have those top moves wired; when bolt-to-bolting these moves may feel easy, but that could feel different when doing the route in a oner and arriving there completely pumped. You don’t want to fall off after all the cruxes and after pretty much having climbed the whole route, simply because you didn’t have the top moves wired.
  7. Before it is time to consider trying the route, proceed to combining sections until you can climb the route from ground to the first rest, from the first rest to the second rest, etc, until the clipping of the anchor. When in the rests, which are usually near a clipping position, ‘practice the rest’ but then have a proper rest on the rope. Don’t just rest on the rock as you would be if you were in your redpoint attempt. Be disciplined, even when it is starting to feel easier.
  8. A very important next step, and at the same time a good gauge of whether you are ready to start trying to send the route, is visualisation. Visualise yourself climbing the whole route, noticing every foot- and handhold, every rest and clipping position, every dynamic move, even where you will calm yourself back down by taking deep breaths. By the time you can visualise the whole route, you are very close to a clean ascent. Some people integrate visualisation with their meditation routine, or visualise just before falling asleep. It is also smart to visualise while you are getting ready to climb the route, and to continue visualisation while resting on the route. Visualisation is widely recognised as a very powerful tool in sports.

Climbing is a creative puzzle solving process that may require patience. A redpoint may take weeks or years. Adam Ondra for instance went to Flatanger 7 times in 2016 and 2017 for an average time of two or three weeks, and he reckons it took several hundreds of attempts before he climbed “Silence” (9C/5.15d).

Cheryl Law climbing “All Riggghht” 6B, Lao Liang, Thailand (2017)


A few years ago I coached Cheryl on her project, a beautiful >30m 6C in Thailand called ‘Family Affair’. We were both fully committed to her sending this route and the whole process was unforgettable for both of us. On every attempt, it was as if the whole world stopped, and it was just us there, silent, as if we were communicating through the rope. When she sent it, she said something that I since then like to remind myself and others of: She is a professional violinist and described the comparison of redpointing with studying a piece of music. When she first receives the music on paper it just looks like a jumble of notes, it looks impossible. Then bit by bit, line by line she starts to play the notes. Then she tries to play all the lines on the page. And she goes to the next page, trying to play every note. Until, after many hours of practice she is able to play the whole piece from start to finish. And, she said: and thát is when it starts! Because then you can play the piece again, but play it with feeling, play it the way it was meant by the composer. Not just as a succession of notes, but as a story. I love that analogy and feel that the same goes for climbing: there is a difference in climbing from hold to hold, and climbing as a dance up the rock.


Conclusion

Redpointing should be part of every climber’s training. It allows you to grow as a climber. It increases your movement repertoire, it improves your climbing grade, and it provides the opportunity to redefine ‘success’ and ‘failure’.

To those climbers who categorically avoid redpointing: it can easily be argued that red-pointing is easier than onsighting, both mentally and physically. There is the advantage of knowledge of the route. As opposed to onsighting, you know what’s about to come, you know the moves and how likely it is you are able to do them. You know that there are rests on the route and where and how good they are. You know where you are likely to fall off and what that fall will be like. Also, while practicing the route and working out the most efficient sequence in between every bolt, you’re only climbing from bolt to bolt and can then rest on the rope, to do the next section completely fresh, as opposed to onsighting where the pump may be building up. End the excuses: allow yourself to get the best out of yourself by (at least occasionally) engaging into a redpoint process.

If you would like to improve your climbing potential and learn how to redpoint you may want to consider joining Rock & Sun’s Performance Coaching Course. Most climbers come away from that week’s course having climbed two grades harder than they have done before, thanks to the combination of technique coaching and engaging in a redpoint process.

(written by Desiree Verbeek)