
Tag: How to

How to improve your onsight grade

How to improve your onsight grade

As climbing instructors we aim to contribute to positive climbing experiences. It is our goal to try and get the most out of people’s potential. An onsight close to your max is one of the most positive climbing experiences to be had. So this blog is all about How to Improve your Onsighting ability. Because let’s admit it: nobody likes blowing their onsight.


What is onsighting?

Onsighting is climbing a route “on sight”. This means that you climb a route without falling or resting on the rope, in your first attempt, without prior knowledge. Even watching a video online might negate the onsight.


Onsighting – a once in a lifetime opportunity

Onsighting is very special because you only get to have one go at it. If you fall, it’s over: you have ‘blown the onsight’. It is no longer and will never ever be an onsight again. (Unless you would like to call it an Alzheimer Onsight when you come back to the route years later and claim to have no recollection of it).

Every route in the world only has one onsight opportunity for each climber. As opposed to redpointing where the climber may need 10 attempts, or a 100, or where it may take the climber years of going back to the same route to practice it and get it completely dialled until they finally (if at all) get it done. The special thing about the onsight is that you only have one opportunity to get it. So you want to give it your full attention. You want to maximise your chances of performing well.

Another way to show the importance of onsight is that if you’re not careful you may run out of routes to onsight. This is most likely to happen in your local climbing area of course, especially if you are not giving it your all any time you set off on a new route. Personally, I deliberately save certain routes for when I am better equipped and more likely to get the preferable onsight experience (which for me is: climbing something that is just about doable but will take a lot of concentration, effort and puzzle solving). So, rather than toproping the route when someone offers me that opportunity, and rather than getting on lead on it just to try some of the moves, I’ll say no until I think I’m ready to give it a proper go.


Why Onsighting?

Climbing is puzzle solving, and onsighting may be the ultimate puzzle: the rock is the crossword, sudoku or 1000 piece Jigsaw puzzle, and you are the one to solve it, with all the tools and strategies you have available to you. Redpointing you can compare to being able to use the ‘crossword-dictionary’, or pencilling in some optional numbers in the sudoku before picking which one it is, or using the picture on the box to see what the Jigsaw puzzle will look like. When onsighting, you set yourself the challenge to solve the puzzle without any help, all by yourself, without mistakes (unless they are mistakes you can rewind, for instance by climbing back down to a rest).

Onsighting close to your max grade is a very rewarding experience; you’ll be fully consumed with the climbing, using all your skills to solve this puzzle. We all have memories of climbing and everything seemed to ‘flow’, where we were fully engaged with the rock, with the moves, and we lost all sense of time and surroundings, completely focused on climbing. We are most likely to experience this state of flow when the challenge of the route hits the exact sweet spot of your capabilities to climb it[i].

Another reason why many climbers prefer onsighting over redpointing, is that it can be a very positive experience: a successful onsight takes only 1 go, whereas a successful redpoint takes more attempts; i.e. the climb-success ratio is per definition higher. (That is of course if climbers measure ‘success’ as reaching the chains – which most climbers do). A climber can onsight 4 routes in a day, whereas it is highly unlikely to redpoint 4 routes in a day.


Improving onsight grade vs ‘normal’ climbing grade

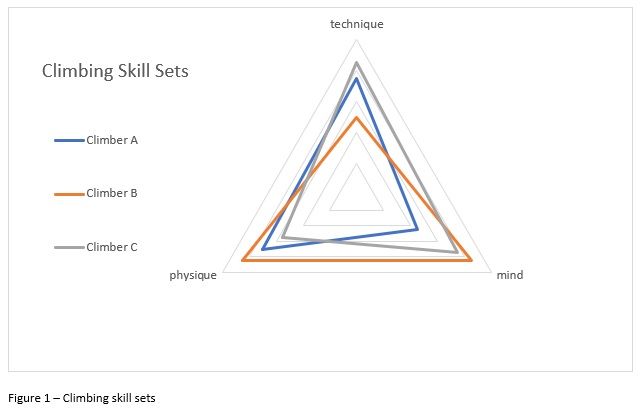
How is Improving someone’s onsight grade different from improving someone’s climbing grade? This blog is not so much about improving your climbing skills (read our previous blog about Climbing Skill Sets here), and thereby improving your grade. What we mean with Improving your onsight grade in particular, is to get better at climbing a route without any previous knowledge of the route. Ultimately the aim is to get your onsight grade closer to your redpoint grade, and to have more of those ‘fully-engaged-flow-like’-climbing experiences.

Some people have a huge gap between what they can climb when they work a route and what they can climb without previous knowledge or experience of the route. This can be the case when choosing routes that are too easy for them, routes that are well within their max. Especially when on a climbing holiday (as opposed to climbing in their local area) many climbers prefer this, allowing them to climb as many different routes as possible. The onsight-redpoint gap can also be big for those climbers spending years on redpointing a certain route; their onsight grade is usually quite a bit lower than the grade they are trying to project.


Three main ways to improve your Onsight ability

  1. Route finding is crucial in onsighting. Most failed onsights are due to having gone the wrong way. As climbers, it is our job to find the easiest way to climb the rock. Make it any harder than necessary and you’re increasing the chance of getting into trouble, getting pumped, or even falling off. Route finding starts on the ground. From here, gather as much information as you can. Where is the anchor? Where are the bolts? Look at differences in the angle of the rock and any of its features that stand out. Where is it less steep? Where is it more featured? Spot any potential rests. Where do you think the crux or cruxes are – f.i. based on the angle of the rock and/or the bolts being closer together? Using a laser pen while doing this can help hugely so climber and belayer are talking about and looking at the same thing. The belayer can then remind the climber when going elsewhere than was decided from the ground[ii]. Please remember though that although on-ground-route-finding is crucial, that doesn’t mean that this is where it ends. While climbing you need to constantly ask yourself the question where the route goes. And it is also necessary to realise that you can downclimb. Climb up, get information about the holds, then climb back down to the rest, and then decide on your route to what you think will be the next rest.

An extra note to people with limited outdoor experience: the climbing does not necessarily go straight over the bolts; it is a ‘route’ and it is your job to find it. The bolts are there to help protect you from hurting yourself should you fall off, and to keep the rope in an as straight as possible line. You are free to go anywhere left and right of the bolts as long as it is safe to do so. “That hold is on the other route” is very much ‘indoor-climbing-speak’. Mother nature didn’t decide that certain edges belong to this or the other route. Even route setters don’t decide on this. Their aim is simply to create climbing and to make it as safe as possible.


  1. A deeply ingrained understanding of the basic movement pattern hugely helps when onsighting. It is important to understand what efficient movement is, and to easily recognise which moves to do given the holds available to you, wasting as little time and energy as possible. The more the principles of efficient climbing have sunk in, both in your thinking as well as in your muscle memory, the quicker you’ll see the correct crux sequence. When I get stuck at a certain section of the route, I know where to look for feet, and I can think ahead: for instance seeing a right handhold, I will look for a left foothold below it. Or when I want to release the low right foot, I automatically look for a left hand above my head and a push down for my right hand. It is consciously thinking about these things that will help you work out the crux sequences quicker, thereby saving energy. If you are not sure as to whether you fully understand the basic movement program, then we highly recommend to come on a Performance Coaching Course, and to be disciplined to keep climbing efficiently afterwards.

Besides a thorough understanding of efficient movement, what also helps to improve your onsighting ability is to increase the number of moves in your ‘climbing repertoire’, for instance by redpointing harder routes.


  1. Getting in the right mindset before stepping on the rock certainly increases your onsighting potential. We like to remind people that they have done their preparation, and that is now time to trust their capabilities and enjoy the process of going into the unknown. Trust the body’s capability to climb and at the same time be very determined. The mindset should be very different from when you’re warming up, or from when you are climbing a route you’ve climbed before, or from when you’re in the process of redpointing. When onsighting especially, you need to set yourself up for:
  • When it gets hard, I will fight harder. I will certainly not say “take”.
  • If I make a move that’s wrong and I can’t reverse it, then I will keep going and risk falling.
  • If I can’t find the technical solution to solve the crux, then I will do it ugly and waste energy. As long as I have been conserving energy on the easier sections of the route, I should be fine. Plus, I may be able to recover higher up the route. It is important to get the balance right between time spent on working out a technical solution and the energy spent while looking for that solution.

What can also help to increase your onsight ability is to do Fall Practice regularly. We want our brains to quickly move from assessing the risk of falling back to focusing on how to climb the next section of the route. Being able to be calm above a bolt means all your focus and attention can remain on the climbing task at hand. Any distractions such as a fear of falling divert part of the brain away from climbing which means you are less likely to succeed in the onsight.


What to do when you’ve blown the onsight?

Accept that you are not going to onsight every route you get on. (If you do, you are climbing below your max. and should be aiming to onsight harder routes). If you are choosing the right challenges for yourself, then you will sometimes fail and you should be prepared to fail. We think it’s a shame that many people walk away from a route when they failed to onsight it. Some do so because they are on holiday and don’t want to ‘waste’ more time on doing the same route again, when they could be climbing a new route. We understand that. But there’s also many people that don’t give it another try because they think they’re not good enough to climb the route. By not giving it a 2nd or 3rd attempt (basically a quick redpoint), they are essentially collecting failures, and missing out on a valuable learning opportunity. There are many gains to be had from turning ‘failures’ into success by redpointing a route. We will go deeper into redpointing in a future blog.

(written by Desiree Verbeek)

[i] For more information about Flow: Csikszentmihalyi, The Rock Warrior’s Way (Arno Ilgner), Hazel Findlay.

[ii] Our next blog will be about route-finding.

Climbing Skill Sets

Performance in climbing is a combination of three main skill sets. It is necessary to have these three aspects functioning optimally for your performance on the rock to be close to or at your maximum capability. Having these skill sets closely aligned will ultimately bring greater enjoyment and satisfaction to your climbing experience.

There is technique, understanding how to move efficiently on vertical ground. There is the mind, the ability to calm the mind down when it feels under pressure, the ability to deal with the natural fear of being off the ground. And then a climber’s physique, strength, power-to-weight ratio, and stamina (see Figure 1).

All three are coming together while climbing. You can’t just rely on your physique, power and stamina, nor just on having amazing technique, or on having a very strong mind. What we notice when we are coaching is that the climber’s performance can not exceed the level of the least developed skill. Let’s illustrate this.

Climber A has quite good technique, has got footwork and knows how to climb using as little upper body power as possible. When on lead, Climber A however finds they are often too scared to move above a bolt, to then fly up the same route when on a toprope; obviously not held back by the technical ability to climb the route. Climber A’s strength and fitness levels are high enough to climb harder. What is holding this climber back is a lack of skills to deal with mental challenges related to climbing. Getting fitter and stronger may make this climber feel more confident in being able to hold on to the holds, and it would buy time to figure out a technical solution for the crux, but ultimately this climber would benefit from exercises to train her mind.

Climber B on the other hand is a strong and physically gifted climber who is not so much distracted by fears. But with poor technique this climber is wasting a lot of energy, and therefore not climbing to their full potential. Mainly pulling on the holds and regularly dragging a leg behind on the easier part of the climb, means the climber is pumped when arriving at the crux of the route. Not held back by fear, Climber B slaps for the hold, makes it, but has no strength left to hold it and falls.

Climber C is a very experienced climber with close-to-being-perfect technique. With over 30 years of climbing experience, mainly trad, this climber has developed very good route-finding skills and is prepared to fall off on both trad and sport routes. Going out climbing regularly means Climber C has a good base level of fitness. But because they never trained specifically for climbing, physical abilities hold back their performance before anything else.

Climbing Skill Sets

Importance of the basics

Before we continue, there is obviously one more aspect to climbing: the basics. Getting the basics right is most important, and superseding all else. We regard the ability to assess risks, the skills to keep oneself (and your belayer) safe, and route-finding as the basics of climbing. You can be as strong, technically proficient or brave as you like, but if you can’t do a correct risk assessment, and/or don’t know how to keep yourself safe, and/or lack route-finding skills, you may get yourself into trouble.

People who lack the ability to keep themselves safe are the last people you would want to make more confident. They might get so casual with exposing themselves to unnecessary or serious risks that they could hurt themselves – or others. What they need first is to become safe climbers. At Rock & Sun we therefore pay a great deal of attention to safety. Initially we focus on clipping technique and positions, belaying, rope awareness, threading anchors, and risk assessments. There are many ways of doing these things and the important thing – especially for experienced climbers – is to keep your ears and eyes open for new developments and improved ways of doing the things you may have done a certain (possibly suboptimal) way for years or even decades. On the Rock & Sun YouTube channel we published several instructional/safety videos[i]. We also spend a great deal of attention to route finding skills – asking the question: “where is it less steep and more featured, from the feet up?” – practicing this for instance with a laser pen exercise[ii].

Once these basic principles are established, climbers can choose to train to get fitter and stronger, or to train the climbing brain, or to improve their climbing technique, or attempt to do it all.


Why we focus primarily on technique and efficient movement

We work closely with hundreds of climbers each year, we analyse their climbing, and dare to say that 90% of them are held back by their climbing technique. Some may think they are being held back by strength and fitness. Others may think that a fear of falling is holding them back. When we’re analysing climbers’ movement patterns, the reality is though that it is mostly people’s lack of understanding the biomechanics and how that affects efficient movement that is holding them back. This is compounded by a lack of route-finding skills. This is no surprise, as most climbers learn to climb in an indoor environment; they have limited time and opportunity to go outside and climb on rock. Climbing indoors, where routes are designed to get harder by putting the holds further apart and forcing the climber to use less than efficient movement patterns, means that when climbers come to climb outdoors they apply their ingrained (indoor) movement patterns on the rock, not recognising that easier options than the moves they choose are available. We will not go into too much detail here, but refer to our previously written articles on Outdoor Climbing Coaching, our video Inefficient vs Efficient Climbing, and to an example of our Video Analysis.


Fear starts in the forearms: Mind – Technique axis

Technique and the Mind are two linked skill-sets (see figure 1). Let’s illustrate this: When climbers lack technique, and lack understanding of where to look for footholds and how to execute moves, they will inevitably overuse their upper body. They will rely more on their arms for their upward movement than is strictly necessary. As a consequence, they are getting pumped quicker, and thát is the moment that the fear sets in: fear usually starts in the forearms. Plus, balancing on the rock face with only one foot is much more scary than moving up on both feet. Climbers rarely show fear when climbing above a bolt when they are on a route that is well within their grade – even though the consequence of falling might be more severe. So it is not necessarily their mind that is holding them back when climbing away from the protection. The mind usually becomes fearful when the climber is facing the prospect of falling, knowing they can’t hold on for much longer.

These climbers could choose to improve their climbing potential by working on their mental skills, but the root of the problem is their lack of understanding of how to move on vertical ground. Once they understand that – and are disciplined enough to reprogram their movement, they are saving upper body strength and it will take much longer before they get pumped – and scared. We reckon that most people we work with have at least two grades of climbing improvement in them, based only on improving their basic movement pattern.


Technique is an easy fix

A nice bonus of acknowledging that it is a lack of technique that is holding you back, is that it is relatively easy to fix. It is not rocket science; it is simple body mechanics. Once you understand the physics, and once you have received personal coaching to understand which bad habits you need to rewire, and have a set of drills that work for you to reduce your weaknesses, all it needs is discipline. As opposed to trying to improve your climbing by getting fitter to postpone the pump. How many people got into climbing because they love doing pull ups, push ups, and deadhangs?! Based on the climbers we work with on our courses and holidays (and on people we watch climbing while at the crag) we are convinced that most climbers do not need to do any additional physical training until they want to climb higher 7s.

Another good reason to focus on developing your movement skills instead of getting fitter and stronger, is that strength and fitness are easily lost during a period of not training or not climbing. After being ill or injured, pregnant, or a too busy period in your life where you did not have time to go climbing, your level of fitness and strength can be greatly reduced. Your technique however stays!


Fear is related to basic skill of doing risk assessments

Having described the link between technique and the mind, we now move on to explaining how someone’s ability to deal with a fear of falling is also strongly related to the basic required skill set of being able to do an accurate risk assessment. If physics isn’t your strong point, when doing your route finding (i.e. trying to find the less steep and most featured way to the next bolt, providing it is safe to go that way) all your options may come back as unsafe. “It is less steep and more featured on the left but if I go that way and fall off, I will swing into that feature there. The route definitely doesn’t go right here, because that’s looking too hard for the grade. I could go straight up here, where it is steeper and the holds are smaller than on the left. It keeps me closer to the bolt, but if I fall, I will land on the ledge I am leaving.”

It is completely normal (and sometimes even necessary) to be scared, because falling is not a natural thing for human beings to do. If you think you will hit something and hurt yourself, being scared prevents you from taking that risk. We should see fear as our friend. However, not being able to assess the angle, direction and length of the fall correctly, and assessing the risk as higher than it is, means you may be unduly scared.

Figure 2 helps to illustrate this. In a hypothetical situation, Climber D and Climber E are climbing the same 100 routes. Climber E always makes correct risk assessments: 20% of falls resulting in sustaining a serious injury, 10% of falls can be managed by f.i. deliberately pushing off while falling, and by an attentive and skilful belayer, and 70% of the falls are safe. Please note that the numbers are hypothetical – it should not be interpreted that if you do a correct risk assessment, 20% of the falls are in a “no fall zone”. Climber D however, on those same 100 routes, thinks that 80% of the time falling off would result in injury, and only 10% of the falls are safe. No surprise that Climber D feels scared.

Assessing fall zones

For Climber D it would be really helpful to make more accurate risk assessments. There are at least three easy ways to do this:

1) while on the ground, get into the habit of watching other climbers climb and imagine their fall if they were to fall off at any point, given the distance from the bolt and the amount of slack in the system. If at some point you assess the fall as not safe, ask a more experienced climber what their assessment of the fall would be.

2) while on the ground, watch other climbers taking falls. Was the fall what you had imagined it to be? This is especially helpful when a climber falls off the crux of a route that you are struggling to commit to. Once you’ve seen someone else fall in the same spot, your risk assessment can be adjusted.

3) while climbing and not willing to commit to a move because you assess it as possibly dangerous, ask your belayer how they assess the fall. Is it safe to commit?

Improving this basic skill set helps to be less scared, helps to calm the mind, and re-focus on the climbing.


Conclusion

To maximise your climbing potential, you need to assess (or ask a professional climbing coach to assess) what your weaknesses are and how these interrelate, in order to get the right exercises for you to improve. Work the weakest link! Work its true source, which may not be the same as how the weakest link manifests itself (remember that ‘fear from the forearm’ is most likely coming from a technical deficiency, not a lack of strength).

Based on several decades of experience with performance coaching for climbing, we conclude that most climbers need, first of all, to be able to make correct risk assessments, to know how to keep themselves safe, and to improve their route-finding, i.e. they need to get the basics right. Then, most room for improvement lies in learning how to move efficiently on vertical ground by understanding biomechanics and applying what we refer to as ‘a basic movement pattern’. As explained before, both of these have a positive effect on the mind. With correct risk assessments of fall zones, there is less reason to be scared. Knowing how to move efficiently saves upper body strength, which means you’re less likely to get pumped – and scared. Development of technique and the mind go hand in hand; by doing lots of mileage climbing easy routes the mind is calm and able to focus on efficient body movement.

When climbers have invested in improving their technique and in their basic risk assessment and route-finding skills, we consider training the brain as the best next choice of action. There are many exercises that help to stay calm and focused on the rock. We have worked together with Hazel Findlay on several occasions; she is a professional climber who specialises in coaching the mental aspects of climbing.

We do of course acknowledge that there is an advantage to being strong and fit. Looking at the Physique – Technique axis, stamina buys you time to figure out the most technical solution to a crux, and strength and power mean you have a greater selection of holds available to you. Furthermore, on the Physique – Mind axis, feeling strong enough to hold the holds, can give an advantage. It can calm the mind and help you to commit to a move. What we notice though is that most of our clients don’t lack strength or fitness.

(written by Desiree Verbeek)

***********************************************************

Interested in a Performance Coaching Course?

Keep an eye on our blog for our next article on Route-finding.

***********************************************************


[i] These videos are not intended to replace face to face instruction by a qualified climbing instructor, they are intended as refreshers for those having been on a Rock & Sun course or holiday.

[ii] Our next article will be about route finding, so keep an eye on our blog. We will accompany it with a video, which will be published on our YouTube Channel.

Watch the rope!

Why are climbers being lowered off the end of the rope?

It seems to me that the instances of climbers being lowered off the end of the rope while lowering are on the increase. I know of several people who have had lucky escapes surviving falls after being lowered off the end of their rope and some who haven’t been so lucky.
While it is something that I’ve always been acutely aware of and maybe have a healthy paranoia of, it is also something that I feel should just never happen.

Rope length

Climbers of a certain age might remember when sport climbing ropes were generally 50m (trad ropes 45m). Then after a few climbing trips in France and Spain it didn’t seem worth travelling with anything shorter than a 60m. Then routes got even longer and you really needed a 70m. These days it’s standard to buy an 80m and even this
might occasionally not be long enough. We keep a 100m in Kalymnos for the 50m pitches.

Having often dealt with ropes being too short, expecting it and planning for dealing with it has developed a certain level of awareness that I think is useful to pass on.

Knot is not always there

A greater number of people are aware of the benefits of tying a knot in the end of the rope. However, relying on the system of tying a knot in the end of the rope is not on its own sufficient, as it has proven to not always be there:

1. Human error

People simply forget, or think that the other person has already tied it. Assuming that the bottom end is tied
into the rope bag but not checking is also a possibility.

2. Someone in your group unties the knot.

I’ve seen this happen on several occasions and each time the belayer failed to notice. An inexperienced climber taking the end to practice tying in or to practice clipping and not knowing what the knot in the end
was there for, will not necessarily tie it back in.

As the knot is not always there, people need to have other reliable
systems in place for noticing that the rope is too short.

Before the knot

There are a few things that we have failed to do when the knot jams up against the belay device, or when the rope disappears through the belay device. If safety is an awareness of danger it might be useful to look at what we as climbers/instructors do ourselves to avoid needing to use that knot in the first place and make our clients
aware of that as well.

1. Read the guide book to see what rope length is recommended and take one that is long enough for any route you might want to do (ropes are cheap but you shouldn’t be).
2. Be aware! If you arrive at a crag and it looks big maybe the routes are long.
3. As you’re climbing the route you’re thinking “Wow, nice long pitch, I love long routes. Hmm, did we pack the 70m or the 80m?” Communicate with your belayer.
4. You’re belaying and your climber seems to be going up forever. Do you think: “Awesome I love long pitches, I’m really excited about getting on it myself”? Or are you looking down at the rope next to your feet and think: “I wonder if it’s long enough for my climber to get down”? Communicating at this point can be valuable!

Middle marks

I’m deliberately not mentioning middle marks when teaching clients. The problem with middle marks is that they can be unreliable. One of the advantages of buying a longer rope than you generally need is that it is often the 4 or 5 meters at the ends that show wear. Cutting 4 or 5 meters off the end of an 80m rope still gives you a useful length rope, but means your mark is no longer marking the middle of it.

Watch the end of the rope!

In recent years, I have been making a point of teaching belayers to pay more attention to the rope next to them than to the person they are lowering. As a belayer it can be hard sometimes to concentrate when your climbing partner is wearing a tight pair of Lycra pants but the rope right next to your feet is what you should be paying most attention to. It’s the only place that danger is coming from during the lowering process. This should be an integral part of the lowering process and is what we should be teaching.
We should also make clients aware of the importance of developing the habit of looking down at the rope while being lowered. It is great to take time to enjoy the view but more important to look down to see the rope next to the belayer and calculate well before you are lowered off the end of it whether it is long enough. I reckon about 99% of the time I’m able to see the rope after a few metres of lowering. Keep the rope visible! not tucked away in your IKEA bag!
Having asked thousands of climbers with a variety of experience where they look when lowering, virtually no one ever answers “the rope”. Even though that is where the danger is coming from, and it is almost always there next to the belayer’s foot.

Every time I hear of or read an article about someone being lowered off the rope the cause is always said to be the lack of a knot. And of course, no one would be lowered off the end if there was a knot, but it would be helpful to acknowledge that the belayer (and climber) failed to pay attention to the rope. We should not be switching off
because (we think) we have fixed the issue by tying a knot in the end of the rope. The knot should not be seen as the first line of defence – it is the last!

Trevor Massiah (MIA) – Professional Mountaineer – Spring 2020

A closer look at Rope Awareness

Is it possible to always avoid getting the rope behind your leg? Maybe not 100% of the time but it is important to give a clear procedure to help people avoid it.

Teaching people how to avoid getting the rope behind their legs at first seems a fairly straightforward thing to teach. However, there is a little more to it than advising climbers to keep the rope between their legs and the rock (rock-rope-leg).

When teaching lead climbing we will often choose routes that are well protected and therefore present less opportunity for the climber to make the mistake of getting the rope behind the leg. As there is quite a bit of new information for new leaders to think about, placing lots of gear when trad leading, or placing trad gear in between bolts when sport climbing, can provide a useful way of deferring teaching rope awareness until later in a course when the information might be more easily retained. It is still possible to fall with the with the rope behind the leg when clipped into gear above the waist, but this is more likely to result in a rope burn rather than falling upside down.

Climber has made the wrong decision to step over the rope while rope running diagonally. Climber may catch their heel or foot on the rope if falling, resulting in rope burn or falling upside down. The right-hand photo shows the climber making the correct decision to put their foot under the rope.


As the consequences of falling upside down can be serious it is something that deserves a reasonable amount of attention.

Most people find the concept of rock-rope-leg fairly straightforward. The difficulty comes when the choice of foothold necessitates making a decision to go around the outside of the rope keeping it between the cliff and your leg or to control the rope with the foot or the leg. I’m going to look in more detail at why we sometimes feel we have made the correct decision but still find the rope travelling behind our leg.

So, is there a rule or procedure that we can apply or teach to help students with these decisions? Yes there is. And most of us have one, and that is: when moving around the rope always go around the outside of the rope. This makes perfect sense as logically if you step inside the rope it would usually end up behind the leg. This is however only part of the procedure. There does need to be a second part to this rule which is: only step over the rope if you are also going past the gear or the bolt below you.

Climber makes the correct decision to go around the outside of the rope.


If the chosen foothold is directly above or not beyond the gear or bolt below, then the correct decision would be to control the rope with the side of your foot or leg. Failure to do this will almost always result in the rope travelling behind the leg once you have moved your body to stand on that foothold. It is moving your body that takes the rope behind your leg. And that is part of the problems. It seems ok to go around the outside of the rope when you place your foot on the hold, but as soon as you move your body, the rope travels with it and ends up behind your leg.

The first photo shows the climber making the correct decision to control the rope with the side of her foot. Second and third photo show how the climber has chosen a foothold that is clearly beyond (to the right of) the bolt below, but made the wrong decision to step inside the rope, resulting in having the rope behind the leg while clipping the next bolt.
The first photo shows the climber making the correct decision to control the
rope with the side of her foot. Second and third photo show how the climber has
chosen a foothold that is clearly beyond (to the right of) the bolt below, but made
the wrong decision to step inside the rope, resulting in having the rope behind the
leg while clipping the next bolt.


Not taking into account the angle of the rope travelling up from the last piece of gear, and/or the foothold in relation to the protection will lead to the rope travelling behind the leg often. A good percentage of clients attending coaching courses is related to having psychological issues that stem from having fallen upside down. Which may have been avoided had they received a more detailed explanation of how to avoid getting the rope behind their leg.

To summarise, in teaching rope awareness we should not just explain the rock-rope-legs principle and teach clients to always go around the outside of the rope. What we need to create in lead climbers is an awareness of the gear or bolt below. If the chosen foothold is past the gear or bolt below: go around the outside of the rope. If the chosen foothold is close to, just above, or not past the gear or bolt below: it is best to push the rope aside with the side of the foot.

For a visual and more detailed description, we refer to this video: “How to Avoid falling upside down – Rope Awareness – Rock and Sun”

How to avoid falling upside down – Rope Awareness

written by Trevor Massiah – Published in Professional Mountaineer Winter 2019

Placing Titanium Bolts

In the previous issue I looked at the lessons learned over the years from bolt placements and the advantages of titanium bolts over stainless steel glue-in bolts. Glue-in anchors that flex or deform can crack the resin, thus creating a crevice. Corrosion loves a crevice and this is therefore likely to shorten the working life of a plated steel or stainless steel anchor.

Here is some guidance for placing titanium bolts, gained from placing thousands over the years. At the time of writing the certified 8mm Eterna bolt (from Titan Climbing) appears to me to provide the best and most permanent solution, but the same placement principles apply to other ring bolts.


How to place titanium bolts – step 1

Before drilling, check that the intended bolt position is in good rock by listening for a solid ringing sound when it’s hit with a hammer. Choose a position that is a good distance away from cracks and edges. It is also worth considering how the gate on the bottom and top of the quick draw will sit against the rock.


How to place titanium bolts – step 2

To place the Eterna bolt, use a 14mm drill bit to drill a 10mm deep hole where you want the top shaft of the bolt to be. Then drill a series of holes as close as possible to each other, directly below. Each hole should be drilled a few mm less deep than the previous hole. A total of three pilot holes should be sufficient with a 14mm bit to spread along a 45mm line. Return to the original pilot hole and angle the drill bit onto the bottom lip of the hole then drill down at an angle, drilling out the gap between each hole until you are left with one vertical trench. The angle of the trench should suit the curve on the eye of the bolt.
Trenching/recessing the vertical back bar of the eye of the bolt can greatly increase both strength and performance. Martin Roberts of Titan carried out tests on trenched and non-trenched bolts. The results showed that the yield strength (load at which the bolt permanently deforms) increased by around 50% for bolts that were trenched i.e. from around 10~11kN to 15~16kN. The bolts deformed elastically (flexed under load and sprung back to their original shape when the load was relieved) at a low load around 4kN when not recessed but when recessed this load increased greatly to around 12~13kN. The typical service load is below those figures, so this greatly reduces the potential problem of fatigue.


How to place titanium bolts – step 3

Once the trench is finished, drill your hole for the shaft of the bolt at the top (where your original pilot hole was). The hole should be drilled at a 90 degree angle to the rock face. In normal circumstances this hole can be over-drilled by about 5 to 10mm.

On steep rock, over drilling can be problematic as the bolt can slide out of the hole. The Eterna bolt has a special design feature that allows for easier installation on steep rock:
Tape the drill bit at 9.5cm and stop drilling when the tape is flush with the edge of the trench, flush with the rock. When placing the bolt gently tap it with a suitable hammer for the last 15mm for a tight interference fit. The last 15mm of the bolt is slightly over 15mm in diameter but will squeeze down then try to spring back once tapped into the 14mm hole, improving the grip.
Do not use a normal steel hammer as it will leave iron deposits on the titanium bolt and the iron will rust, which may cause corrosion issues with the titanium anchor itself. Either use a proper stainless steel climbing hammer, or a rubber or wooden mallet.


How to place titanium bolts – step 4

Check that the bolt fits easily into the hole: the vertical shoulder of the bolt should fit neatly into the trench. If any extra length is necessary, this can be achieved by drilling down on the bottom lip of the trench. The reason for the slot is to semi-recess the eye of the bolt to help ensure the strongest possible bolt installation for the given position. It also greatly reduces the effects of fatigue during normal use due to the increased stiffness. I always carry three bolts with me and check each one to allow for any slight variation in size.


How to place titanium bolts – step 5

It is vitally important that the hole and trench are clean, and free of any rock dust before proceeding any further. I use a Hilti wire hole brush (a Metolius brush or a shaved down hard tooth brush with the bristles cut short can also work well) and a manual Hilti blow pump for alternate brushing and blowing. Alternate between brushing and blowing until dust is no longer visible.


How to place titanium bolts – step 6

Use the epoxy resin as per the manufacturer’s instructions. I recommend the tried and tested Hilti HIT RE-500. Pure epoxy resin is often as hard if not harder than the rock it is being placed in, so the more glue you use the better. It will also provide a greater chance of a good seal from the rock and increased adhesion to the bolt.

It is important to express and discard three full trigger pumps as a precaution before gluing your first bolt. I usually express the three full-trigger pulls into a plastic bag on the ground and then make three test beads somewhere on the ground or on the rock. This allows you to check how the glue has cured when you return the next day. If the beads are soft there was a problem with the mix. (If starting a new tube high up, one pull of the trigger for each bead.) The guns have an automated puncture system and one of the tubes is usually punctured slightly before the other leading to an uneven mix at the start.
There is a balance between speed of curing vs. “going-off” within the nozzle, and times vary depending on temperature. In hot climates, you should have a good 20mins prior to the resin going off in the nozzle.


How to place titanium bolts – step 7

Insert the nozzle fully into the hole. Almost fill the hole with resin by pulling on the trigger gently while slowly withdrawing. Try to avoid creating any air pockets by only withdrawing the nozzle while resin is being expressed. Insert the bolt, slowly rotating it as you do so. If you feel any resistance it will be an air pocket, this is best solved by withdrawing the bolt 1-2cm and inserting again, you may hear a small popping sound when the airlock is broken.


How to place titanium bolts – step 8

Continue inserting the bolt until it sits neatly in the trench. Having an ice-lolly-type stick is useful for dealing with any glue that oozes from the hole (a good excuse for a Magnum!). This can be used to backfill the trench and tidy up at the end. You can also use them to scrape excess glue from the nozzle.


How to place titanium bolts – step 9

It is important that the bolt is not recessed so far that larger snapgates do not fit. I test this while drilling with a solid gate on the bolt before gluing. The inside of the bolt eye should be flush with the rock surface.


How to place titanium bolts – step 10

You should leave at least 24 hours before loading even in a hot climate, although the glue should be cured within 12hrs, this is also where the test beads you made before gluing are helpful. Hit them with a hammer; if they’re completely dry, hard and brittle, then the bolts will be good.


Trevor Massiah is a Mountaineering Instructor based in Spain and is the owner operator of Rock and Sun which runs climbing and bouldering courses and holidays in many parts of the world. He has been working in the outdoors for 33 years and has climbed extensively around the world. His favourite crags are Pembroke, Taipan wall and the Needles California. He has put up many routes – both trad and sport – in the UK, Thailand, Australia, China and India, and is currently involved in rebolting existing routes and developing new routes in Thailand and the Costa Blanca.


by Trevor Massiah

Published in Professional Mountaineer Summer 2017