
Navigation for Rock Climbing

In the previous blog ‘A Climbing Framework for Sport Climbing’ we looked at a framework as an aid to better decision making for leading. The framework included a simple formula for navigating between the bolts: 

Navigate only for the feet, choose hand holds based on the direction you want your feet to travel. Go where it is less steep overall for the feet but be sure to risk assess your chosen route before committing to it. 

In this blog ‘Navigation for Rock Climbing’ we are going to provide a deeper explanation of the rationale behind it because, although it sounds simple, it’s a bit like learning to use contour lines when map reading. It takes some practice before the information jumps out at you, and you also need to fully understand and trust the process to commit to practising it.

Find -and climb- the easiest way

Apart from safety and coaching efficient movement, route-finding or navigation has become a primary focus when coaching outside. The fundamental concepts of moving more efficiently are usually easily understood as there is immediate feedback of the climbing feeling easier, the upper body having to work less, and the arms not getting as tired. On a Coaching Course, which is 5 climbing days filled with video analysis, theory and drills and exercises to understand and practise efficient movement, climbers improve on average two grades in one week. With navigation, people can take a long time to understand and engage in the process, especially because seeing the change in angles is difficult at first and it requires climbing routes in several different (steeper and less steep) ways to compare and get the evidence. Plus, after the week of climbing outdoors, this skill can not continue to be practised indoors. In our experience more than 90% of the climbers that we work with climb at least 2 grades harder indoors than on rock. People were still way off their true potential despite the obvious improvements in their movement skills. So, we realised we needed to put a greater emphasis on route finding. However well you move on the rock and whatever strength and fitness gains you make, none of it will fully translate to your maximum grade if a good percentage of the time you are navigating the “wrong” (harder) way. It is possible to argue of course that there is no wrong or right way as we have the freedom to choose where or how we climb each route, but when coaching we are being asked to help people climb to their full potential, so this involves both technique and navigation (climbing the route the easiest way and doing the most efficient moves). 

Sandbag? Or did you not find the easiest route?

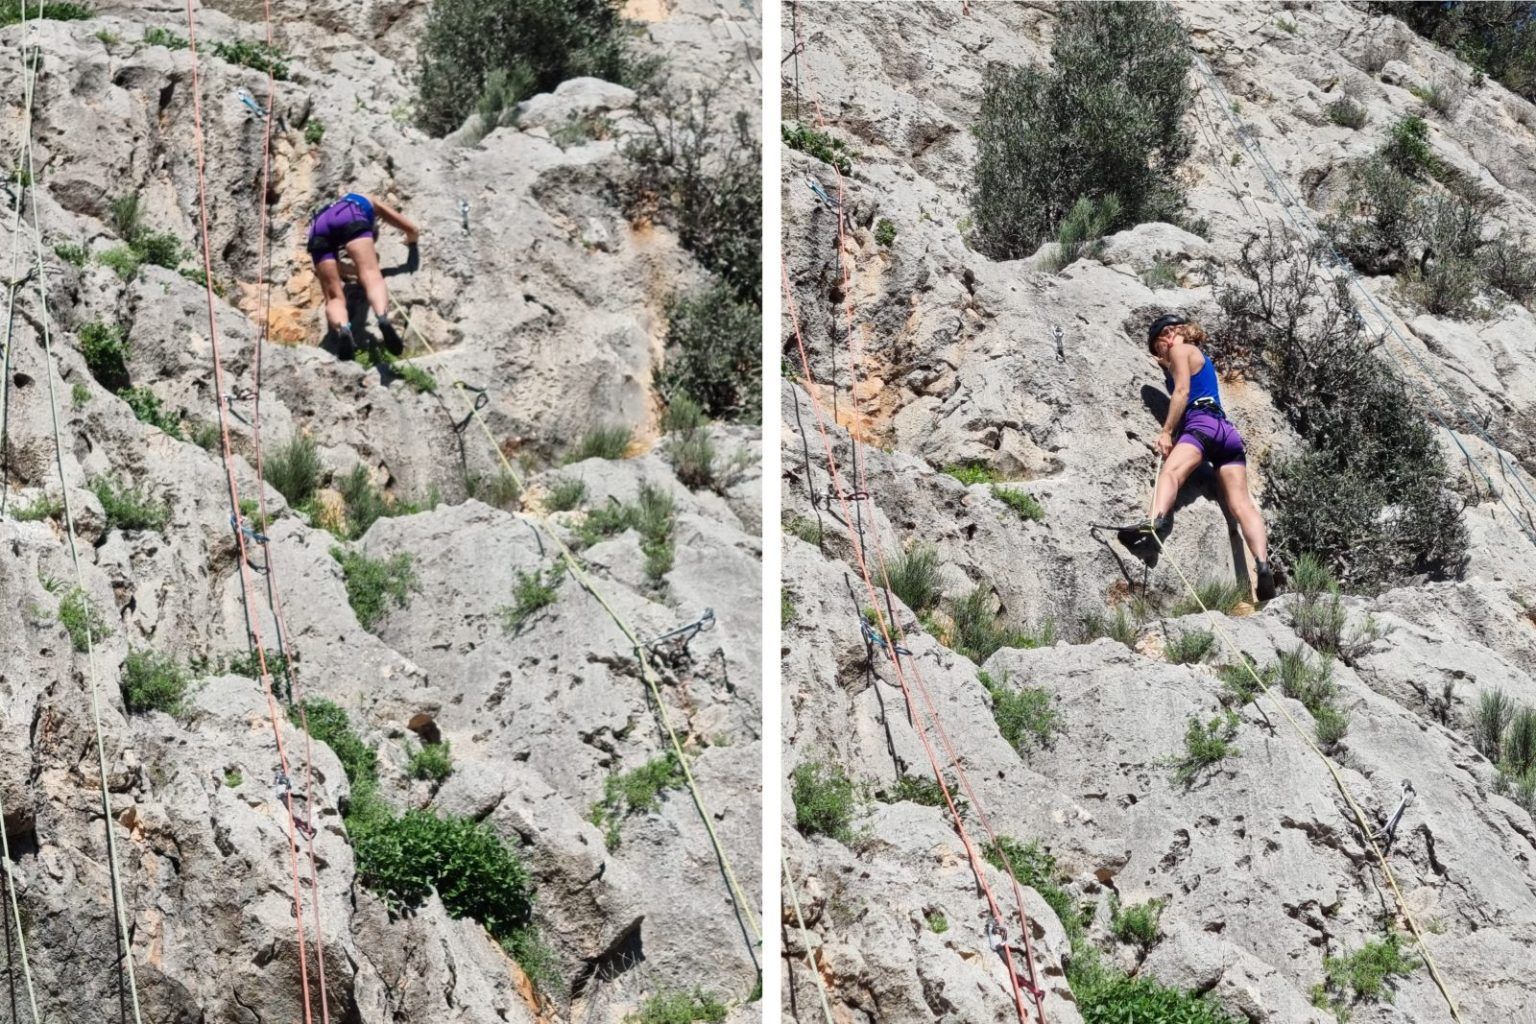
We were fortunate enough to have a lot of spare time on our hands during the pandemic and chose to spend much of it developing our local crags. Our motivation with new routes has been to bolt at a useful grade for coaching on. We noticed quickly that many local and independent climbers thought many of our routes were sandbags (much harder than anticipated). Fortunately, we are often able to watch these routes being climbed while working with our groups. We have been surprised or even shocked at some of the route-finding choices and fully understand why the routes were thought to be under graded. I couldn’t resist trying to climb a 6a+ that we had bolted the way we had seen several climbers try it. Climbed this way I figure it would be at least 7b!

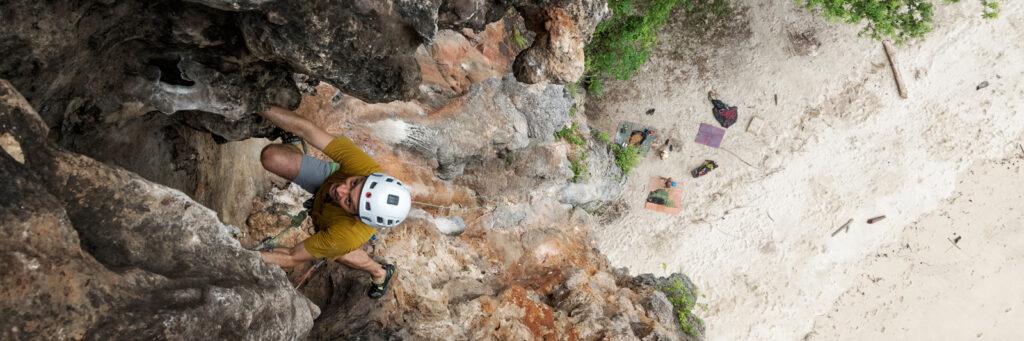
While observing and discussing with our clients how they determine where a route goes, it is apparent that most climbers use things that are not necessarily helpful such as chalk, handholds, the bolts or an arbitrary distance that they are allowed to climb left or right of the bolts. Therefore, we have tried to come up with a dependable way to assist with route-finding choices rather than just beta which is only useful on that one route. We find ourselves constantly repeating the mantra of ‘look at your feet and follow the least steep way to your destination’. This is literally what we always start with when climbing for ourselves and we find it hard to think of routes that do not fit with this approach. 

Climbing is problem-solving

Climbing is a problem-solving exercise. The first three parts of the problem are cerebral not physical:

  1. Reading the rock/navigating. Where does the route go?
  2. Risk management. Is where I want to go reasonably safe?
  3. What sequence of holds and movement is most efficient.

Only then do we get to do the physical bit: moving in the chosen direction in the most efficient way.

The other route does not exist

We often hear questions like ‘isn’t that the other route’ or ‘am I allowed to go that way or is that cheating?’. These questions often refer to ‘will I have climbed the grade or made it easier?’. We find this interesting, as routes are graded for the easiest way, and the whole point is to find that easiest way. If there is a safe easy way to do the route, then that solution is the grade. 

We’d like to emphasise that while route finding any bolts on other routes can be ignored. When bolted routes are close together, one of the routes was there first so all the holds on that section of rock were part of that route. It does not make sense that when a new route gets bolted that some of those holds are then considered as no longer ‘in’ because they are now ´on the other route´. We often find ourselves saying ´the other route does not exist´ and ´the other bolts do not exist´. You are climbing your route, with your line of bolts there to keep you safe. So you go where it is easiest, least steep and safe for your route. The only route that exists is the one you´re climbing at that moment. Granted, the rock being the surface we climb on, sections of it can be climbed by multiple routes. Multiple routes may use the same section of rock. 

Besides the point we´re making that you can´t be ´on the other route´, there is also no such thing as being ´off (your) route´, unless your chosen route is unsafe, in order words: unless the bolt does not keep you safe on your chosen route.

When the hardest routes in the world are climbed the first ascensionist might be searching for the new hardest line, but they are not going to avoid an easier section then claim to have done the hardest route and not expect it to get downgraded pretty quickly! If you are confident in your ability to assess the risk, you are free to move as far left or right of the bolts as you like: climbing is an individual experience. From a coaching perspective though someone is paying for information on how to make climbing easier, how to become a better climber and reach their full potential. We find that helping them improve their navigational abilities is essential. 

Historical context to Navigation

People often find it easier to understand our approach when given some historical context of the development of the sport. From hill walking to mountaineering to rock climbing and bouldering. 

When walking uphill we tend to take smaller or shorter strides as the terrain steepens. We may also zig zag to reduce the incline and reduce physical effort. We will literally navigate our way around any steeper difficult sections. Mountaineers will be drawn to steeper harder sections seeking out more adventure, wondering if the summit can be reached via this harder steeper approach. Mountains can of course offer many different routes and challenges, some of which maybe offering too great a risk without the ability to climb sections of technical cliff faces and ridges. Early mountaineering routes would avoid these features, as without the necessary skill and equipment they were not yet possible. 

As mountaineering routes became more technical, taking on steeper more challenging terrain, it became necessary for mountaineers to be more skilled at climbing rock faces. This led to mountain climbers practising these skills on outcrops and cliffs in preparation for climbing in the alps and the greater ranges beyond Europe. This is how traditional climbing was born. Sport climbing followed and then of course the obvious evolution to bouldering -practising hard moves close to the ground as a way of improving performance on roped climbs. These facets of mountaineering are now considered disciplines in their own right. Looking back at each can help in the understanding of how our approach to climbing has been shaped.

Some boulderers will never tie onto a rope. Some rock climbers will never climb a mountain. The thing that they all have in common is that they all fundamentally begin with at first avoiding the most difficult challenges and then gradually seeking out those more difficult climbs. They all also involve navigation but with each one in turn the navigation becomes more subtle nuanced and therefore easier to overlook.

Summary

Navigating the terrain that we move on is the main purpose of all mountaineering disciplines. With a greater number of climbers bouldering (deliberately seeking out hard moves) and/or mainly climbing indoors where route-finding skills cannot be developed or practised, we see teaching climbers how to navigate the rockface and find the easiest safe way as the task of outdoor climbing coaches.

Video

To accompany this article, please watch the Navigation for Rock Climbing-video on the Rock & Sun YouTube channel.

This navigation tool for rock climbing has been developed by Rock and Sun (Trevor Massiah, MCI & Desiree Massiah-Verbeek, RCI) and was published in The Professional Mountaineer, March 2025.

A climbing framework for sport climbing

A climbing framework for sport climbing

This is a practical step-by-step checklist of how to approach the assessing and climbing of a sport route safely and efficiently. Everything else you do when climbing should come after and be structured around this. 

Let’s first assume that we are able to determine that the route looks safe in terms of loose rock and that the bolts are well placed and in good condition. 

Climbing is a navigation exercise

We should see the route as a navigation exercise from the ground to the anchor, clipping each bolt in turn. It can be helpful to read the route from the ground. It is important to remember that things look very different close up, so we also need to practise reading the rock from the perspective we have when climbing. From the ground we need to identify where the bolts are, and where the climbing may be around them.

  1. In order to navigate accurately it is necessary to have a destination. The destination is where your feet need to be to clip the next bolt. It is therefore important to develop the ability to judge the distance from your feet plus your reach to determine where your feet will need to be so you can clip the bolt. An average reach is 2 metres. So, unless the bolts appear to be further apart than this, the previous bolt might give a useful indication as to where your feet need to be. It is however not as simple as just always aiming for the bolts with your feet.
  2. Remember that when you set off you are only ever heading to the next clip. Once there, you can assess the climbing to the next bolt. Breaking it down this way might also make the route feel less intimidating.
  3. If you find yourself having negative thoughts when assessing the route, try to give two positive thoughts to every one negative. An example of this could be; ‘That looks steep’! Your response could be: 
    1. ‘Well, at least any falls would be clean’. 
    2. ‘The route looks well bolted’
    3. ‘Good job I’m feeling strong’!

Once you’ve decided that this is the route that you’re going to crush, you should take as much route-finding information as you can from the ground. It is important though to remember that the further up the route you are looking the harder it becomes to accurately assess the route (this does not mean however that it is not a useful exercise).

How to navigate?

When navigating, the journey starts from your feet, therefore it is best to navigate from the feet up. You will first need to identify your destination. As mentioned previously, this is where you think your feet will need to be to clip the next bolt – or to clip the quickdraw if it’s already in place. Over time you will get better at judging the space between your feet and your reach. 

As the journey always begins with your feet, look up to see where you are going, then down at our feet to see how you are going to get there.

From your toes you will usually have three obvious options to start your journey. 

  1. Straight up
  2. Left 
  3. Right

Occasionally, it might be down before going left or right. This will happen if you need to stray from the line of the climbing to more safely clip the bolt before navigating to the next. 

Your chosen route should be the least steep overall, not just least steep to begin with. And certainly not just “oh it’s not steep there, let’s go”. It is important to carefully consider all three (or four) options carefully before committing to one. 

Now, and this is probably the most important part of the process: We think climbing is in essence about navigating your way up a particular route as safely and as efficiently as possible. 

Any chosen route from one bolt to the next absolutely must be risk assessed before setting off!!!

You need to allow the bolts to keep you safe. It is important to be aware that the bolts are generally placed in as straight a line as possible, allowing the rope to run and stretch freely during a fall. Therefore, bolts cannot always be used to determine exactly where the climbing will be. But we have noticed that when we give people the navigation formula, they do tend to stray off route into the no fall zone if they fail to pay enough attention to the final part of the formula which is assessing the risk of the chosen route. 

NOTE: It is not always safest to just stay close to the bolt. On many occasions it can be less safe to be directly above or close to the bolt. It is necessary to be aware of the terrain below you as you move and not just assume that staying close to the bolt will be enough to keep you safe.


Summary

The steps of the climbing framework are: 

  • What is my destination; where do my feet need to be to clip the next bolt?
  • What is the least steep route for your feet to get to that destination?
  • Is the chosen route within what is an acceptable risk for you?

To accompany this article, please watch the Climbing Framework Video on the Rock & Sun YouTube channel.

This climbing framework has been developed by Rock and Sun (Trevor Massiah, MCI & Desiree Massiah-Verbeek, RCI) and was published in The Professional Mountaineer, December 2024.

How to structure your climbing day

Strategy and a little bit of discipline are key ingredients to a successful day of climbing.

Far too often we see climbers arrive at the crag, full of enthusiasm and energy, with their goal for the day in mind. So keen to climb hard that day, that they don’t bother warming up. You can see them thinking (or sometimes we are lucky enough to overhear them say): “I think I can warm up on the route I finished on yesterday”, or “I don’t want to waste energy warming up and then be too tired to get the red point of my project”. So they start on something that is too hard for them to warm up on, which may lead to getting pumped, frustrated, or both.

Over the years we have realised that most climbers don’t think much about how to structure their climbing day. Some don’t realise how important warming up is. Some don’t know how to plan the day in such a way that they climb to the best of their ability by the end of it. And how are they supposed to know if nobody has given them advice on this?

This blog is all about how to structure your climbing day to get the best out of your body and mind.

Warm up.

Get your body and mind ready for the climbing day ahead. Climb a route that is very easy for you. A route that is well within your grade and don’t expect to fall off of or even get pumped. So you can just let the body move, not getting physically or mentally stressed. Climb it in your comfort zone the whole way up. Should things for some reason not feel easy for you during your first route: let go and sit on the rope.

Ego.

Our ego can get in the way of ourselves at this point. You don’t want to let go. You don’t want to ‘lose face’. You may even let the other climbers know “I climbed this without problems last time I did it”. You hold on and struggle on, your arms getting more and more pumped. You could of course have misread the guidebook and be on something harder than you intended.

Avoid Flash-Pump.

It’s called a flash-pump and it is very difficult to recover from. It may well stay with you all day. A warm up is what it is, a warm up. Get the blood pumping around your body with gentle movement like jogging or jumping. Lubricate the joints, activate the muscles. Don’t let your performance on the first or second climb affect your confidence. Don’t come to any conclusions about how you are going to climb that day based on how you climb the first few routes. If you felt clumsy, unfocused, tired, distracted or any other negative sensation, that is normal: you’re warming/waking yourself up. This is exactly why we warm up. To get that out of the way.

Fall.

We recommend to include some deliberate falls in your warm up routine. Letting go and practicing getting the landing right, releases the tension in the body and mind. Once we have experienced the apprehension before letting go and then the sensation of falling, we have reminded ourselves that we know how to fall and how to land. It relaxes you into the climbing. It stops you from over-gripping the handholds. It slows down your breathing. All of which help to increase the enjoyment (and performance) of your climbing. When doing fall practice on a regular basis, it has proven to be sufficient to do 2 or 3 Clip-and-Let-Go falls every time you go climbing. That hardly takes any time, and is extremely beneficial. Please read our blog “A fresh look at Fall Practice”.

Mileage.

Now we are ready for the main part of our climbing day.

As a rule of thumb, we aim to climb 6 routes in a day: 2 easy, 3 mid, 1 hard. And we rest at least 10 minutes in between every climb. This is increased to a 20 to 30 minute rest when we climbed to our max.

This rule of thumb can vary based on the aim for the day. If it is a day to do some climbing drills to improve your movement, then you would increase the volume. You would climb 10 routes, 8 of which easy where you can apply the drills, 1 mid where you incorporate the drills in the way you climb the route, and then 1  hard route where you can let the drills go out of the window and just try to climb the route as best you can but not worrying too much if you can’t hold your form.

If it’s a day of redpointing your project, then you may do 1 easy warm up route, 1 mid warm up route which includes some fall practice, and then move on to your chosen project. You could continue your warm up by bolt-to-bolting that route, or by stick-clipping your way up. Otherwise do something close to the grade of your project and if possible a similar style of climbing. Depending on how close you are to sending the route, the angle of the rock and how easy it is to bolt-to-bolt the route without falling into space and struggling to get back on: once you’ve reached the top, you could choose to toprope the route. And ego comes into play here again. Do no try to climb your project clean on toprope so you can say you’ve done it, or so you build confidence in your abilty to do it. It is smarter to hang or fall and repeat certain sections. Figure out the best sequences. Memorise the crux(es) of the route. And then your body is properly warmed up and you have all the knowledge in your head so you would then have a lead attempt.

Golden Standard.

Whether you are planning a day of ‘just going climbing’, onsighting, doing drills, or redpointing, we recommend that your climbing day meets the Golden Standard of 80:20. Where 80% of the session is practice and 20% is performance.

We wish you good luck in staying patient and in choosing discipline over ego, and hope you’ll experience the benefits of adding some structure to your climbing days. And don’t forget to have fun even when you fail.

A fresh look at fall practice

Being comfortable with falling is crucial in order for people to be coached effectively. Being fully focused on the climbing itself without being overly fearful of falling leads to better quality practice and higher performance. Confidence in assessing the outcome of falling and knowing how to react also creates a safer climber. However, most climbers we work with either never practice falling, only practice indoors or do it so infrequently that it’s ineffective. Here we look at ways of making regular fall practice more accessible, fun even.

Why Fall Practice

Confidence in falling increases the chance of climbers trying what they consider to be low-percentage moves (see Figure 1 – orange arrows). Ultimately leading to them climbing closer to their potential.

Many climbers take an alternative route. By practicing moves, becoming technically proficient or fitter and stronger, climbers turn low-percentage moves into high-percentage ones (blue arrows), thereby reducing the likelihood of falling.

 Staying within the comfort zone

Most of our clients have experienced fall practice at their local gym, only few have done so outside. The practice usually consists of taking a leader fall by jumping off with the feet above the last clip. Although intended to reduce the fear and to practice reacting correctly while falling and landing, for most people this is an unpleasant experience with few left feeling keen on repeating the experience regularly.

In recent years we have learned that it is possible to achieve the desired result without taking falls with the feet above the protection. It is important to work within the climber’s comfort zone, and gently push the edge of that a little further. Comfort zones differ from person to person, and can change on a daily basis. Explicitly aim to start with an exercise well inside the climber’s comfort zone and not push too far or too quickly as that is likely to result in an uncomfortable experience that they may then not want to repeat.


Some Practical Considerations

Of course it is not always safe to fall and falling is not simply a case of letting gravity take over. There are many things the climber and belayer can do to reduce the risk of injury. Safety when climbing involves dynamic or continual risk assessment. We all have different levels of spatial awareness and understanding of physics. For many it is important to experience falling regularly and in different situations to increase the ability to assess risk and act accordingly. Without this climbers may either be putting themselves at risk or be terrified when the consequences of a fall present little risk. With experience climbers are better able to assess how far they will fall and whether they are likely to come into contact with the ground, ledges, or other objects during the fall. Where it is not safe to fall, it may be appropriate not to commit to the moves, but reach for the clip stick, down climb or lower to the ground.

Executing a leader fall:

  • Look down at feet, land with soles of the feet.
  • For stability, keep feet shoulder width apart.
  • Cushion the landing by bending the knees as feet touch the rock
  • Grab the rope near the knot to avoid falling upside down
Climber doing “Clip and Let Go”-exercise to practice falling

How to do Fall Practice

There are several stages to start the process of fall practice. It is important not to move from each stage unless the climber has become comfortable with the exercise. Some climbers may not move beyond stage 1 – but can still experience huge benefits, some climbers may start at stage 5.

  1. On toprope the climber simply practices bending the legs and pushing off, then bending the knees to cushion the landing as they swing back in with the soles of their feet. Increase the distance by pushing off harder and harder. When doing fall practice on toprope it is beneficial for the climber not to hold onto the rope but relax the arms.
  2. The climber walks or runs sideways until they are comfortable with the inevitable pendulum this will create. Then move on to pushing out with their legs (as in the previous exercise) at the end of the pendulum creating a swing across the wall. This improves their skill of managing sideways falls and landings. We also aim to achieve a sense of fun and being more confident in their ability to manage a fall when sideways to the protection.
  3. Toprope falls; on reaching each quickdraw, the climber touches it and jumps off immediately. The process is repeated at each quickdraw. The aim is to minimize the hesitation and assess how relaxed the climber is. The belayer needs to assess the appropriate amount of slack in the system from a safety perspective. As confidence increases the belayer can slowly increase the amount of slack in the system. Often simply announcing that there will be more slack, (even with the slack not actually there) will elicit a nervous response: a hesitation to let go upon touching the quickdraw, stiffening in the body, hands moving towards the rope, and/or an audible shriek while falling.
  4. This stage is best done on lead and the climber should be at least 2 metres below the designated clipped quickdraw (with a safe fall-zone, ideally slightly overhanging and an appropriate distance up the route). Climber needs to choose a climbing position with 4 points of contact, and easy enough to hold so the exercise can be repeated a number of times. The climber should take three deep breaths, and on the 3rd breath out, push up from the legs, touch the rock as if going for a handhold and release. We are aiming for the climber to actively go for the move and then feel, look and even sound relaxed on the fall. The first falls should be with the minimum amount of slack. Once the climber is comfortable with that fall, increase the length of the fall by introducing more slack or dynamic belaying. This process can be repeated with the climber’s chin being above the quickdraw. Not having the rope in view is usually enough to elicit a greater stress response. This exercise could finish with the climber taking lead falls with the feet above the quickdraw. We find this to be rarely necessary. This exercise is particularly useful for breaking the cycle of freezing and eventually letting go which leader fall practice often promotes.
  5. On lead, the climber clips each quickdraw, and then lets go. Variations in the fall are achieved by the belayer having more or less slack in the system – providing a soft catch where appropriate – and by the fact that naturally some clipping positions will be sideways to the protection. For this exercise it is obviously far more important that the belayer is skilled. This process carries a greater degree of risk. It is necessary to designate a starting clip from where to start the exercise, which may be the second or third quickdraw. From a safety perspective it is useful in this exercise for the climber to pause a second before letting go to check the clip has been made.

As mentioned, fall practice can start at any of these stages. Before moving to the next stage, ask the climber to give feedback and assess their body language. Some signs of fear or nerves: hesitation in letting go, stiffness or tension in the body especially the arms, or audible shriek while falling. In this form of ‘immersion therapy’ it is important to recognise when the climber is reaching their limit. The aim is to keep the sessions positive, even fun! Only move on to the next stage when both climber and coach agree that the climber is ready.

Climber doing “Clip and Let Go”-exercise to practice falling

Final Words

Our experience is that most climbers don’t even want to think about falling, let alone practice it. Others say they are not frightened of falling and therefore don’t need fall practice, despite displaying the obvious signs of fear. Without regularly experiencing or practicing falling, any original fear or apprehension tends to creep back in.

There is more to falling than just letting go.

With this fresh approach to fall practice, falling becomes something to be incorporated into every session, rather than being a stand-alone session. It also provides the climber with safe non-intimidating options that they are likely to continually practice. We have been genuinely surprised at having some of our most fearful clients actually requesting some form of fall practice at the start of a days climbing.

Published in Professional Mountaineer, Summer 2021. Words and photos by Trevor & Desiree Massiah

The Art of Redpointing

The Art of Redpointing

Climbing magazines, climbing videos on YouTube and climbers’ posts on social media are predominantly focused on redpoint ascents. The hardest routes in the world are redpoints, such as “La Dura Dura” (9B+/5.15c) sent by Adam Ondra as well as Chris Sharma in 2013, and “Silence” the first route of its grade (9C/5.15d) sent by Adam Ondra in 2017.

Redpointing is crucial to develop as a climber. It raises your overall climbing standard and allows you to climb much harder than when onsighting. This blog exlains how redpointing provides opportunities for learning and growth. It also describes what can be considered an effective redpointing process.


What is Redpointing?

Redpointing is lead climbing a route without falling or resting on the rope, having previously tried and failed to climb the route cleanly, either on toprope or lead. Before the successful redpoint, this process is also referred to as ‘projecting’, or trying a project.

The term redpointing originates from the mid 1970s, when German climber Kurt Albert recognised the potential of free climbing (as opposed to ‘aid climbing’) and started to free climb in his local area, the Frankenjura. While he was attempting to climb the route free, he would paint a red X on the rock near the pitons when he no longer needed these as aids, as handholds or footholds. Once he was able to climb the whole route without using any of the pitons, he would paint a red dot at the base of the route, to mark that he had achieved his goal of free climbing the route. This rot-punkt was translated to red-pointing. The concept of redpointing (as in: free climbing, not the idea of painting red dots on the rock) became very popular in the 1980s and 1990s with the increase of sport climbing worldwide.

Trevor Massiah climbing Morgan (7B+), Sikati Cave, Kalymnos, Greece (2017).


Some climbers never redpoint

Redpointing has become the most popular way to sport climb as people recognize its usefulness in raising their standards. That said, we work with hundreds of climbers a year and quite a few of them say they have never had a project, and never enter into a redpointing process. Instead, they choose to mainly focus on onsighting, which can be great (see our blog “How to improve your Onsight grade”), but in our opinion onsighting will inevitably result in the need for redpointing. If climbers pick the right challenge for themselves when aiming to onsight a route, then they will at some point fail their onsight. Rather than walking away and trying another route, this should be seen as a crucial opportunity for learning and improvement.

There are some good reasons (or excuses) to not enter into red-pointing. Climbers associate it with a fear of falling (and they will generally make more ‘air miles’ while redpointing than when onsighting). Redpointing can also be associated with a sense of failing, as by definition you are not getting to the top in one go. Also, redpointing can be mentally, emotionally and physically exhausting. If not careful, it may result in disappointment, frustration, dissatisfaction and/or tears. Many climbers therefore prefer onsighting: they would be less likely to fall (i.e. they experience less or no fear), and they get to the top in one go (i.e. they get the immediate reward).

So although onsighting is fun and probably the best thing to do when on a short climbing break in an area where you haven’t climbed much before, there are a lot of climbers out there, who just always try to onsight, and don’t ever allow themselves to redpoint – even if it is just turning a failed onsight into success by climbing it a 2nd or 3rd time.

The short-term gains and rewards of only ever onsighting don’t outweigh the long-term losses. What I mean is that by only onsighting climbers are not allowing themselves to get the most out of their climbing potential. They haven’t explored their limits. They are staying within the boundary of their ‘onsight-grade’.

Sport Climbing Holiday Costa Blanca Desiree Verbeek_DSF4404
Desiree Verbeek sending her project Memoria de Pez (7A+/7B) Tarbena, Costa Blanca (2018).


Why red point?

Redpointing should be part of everyone’s training. It is not something that is only for ‘good’ climbers. Every climber, beginner or advanced, can use redpointing to push their limits and increase their standards.

I differentiate here between a quick redpoint (about 3 attempts), and a longer redpoint process where you have chosen a proper project.

A quick redpoint should at least be done occasionally, after a failed onsight. Trying the route a second or third time, means you give yourself the opportunity to turn ‘failure’ into ‘success’. You will learn from whatever mistake you made on your first attempt; maybe you went the wrong way, maybe you ended up wrong-handed, maybe you missed a rest. Entering into a redpointing process, and spending more time on finding the correct route, or figuring out a specific crux sequence, means you will improve your route-finding skills as well as your problem-solving skills.

Redpointing a route that is significantly harder than anything you have climbed before comes with even more advantages. When I first try a route like this, thoughts enter my head such as ‘this is way out of my league’, ‘this is just impossible’, ‘I will never be able to climb this’, ‘this route is Chinese to me – I don’t understand any of it’. It is a very fulfilling process to slowly, step by step figure out how to climb it and turning the impossible into the possible.

When sending your project, it is very well possible that you won’t just do it by the skin of their teeth; it may well feel relatively easy! This is because during all those climbing sessions you got to know the route in a much more intimate way, and you figured out how to climb this route in the very best way, knowing that you need to get everything right in order for you to be able to climb this. You are increasing your movement repertoire (i.e. your personal ‘dictionary of moves’) and by doing these same moves over and over again, you are perfecting them and building muscle memory.

When you are sending the route it may feel like (and/or look like to other people at the crag) a dance up the rock. You are climbing the route with style, with poise, in a state of flow. Even though the route was too hard to start with, and didn’t allow you to get into a rhythm, once your technical ability and knowledge of the route matches the challenge of your project, you are likely to experience the well sought-after flow experience.

Entering into a long and demanding and challenging process also provides the opportunity to deal with failure. If you’re not falling, you’re not trying hard enough. If you want to get close to the best you can be, then climbing is largely about failure. You will fail more often than you succeed and you may as well (learn to) enjoy this process. Redpointing is a good way to get used to collecting more failures than successes. Plus, that one-time success makes up for all the failed attempts before it.

It also helps to redefine failure and success; failure is not having tried your best and/or not enjoyed your day, and success is having tried your best and/or being happy. Climbing is much more than touching the chains. Spending time outside, climbing and trying hard, falling off, solving the puzzle bit by bit (or even seemingly making no progress at all), sharing beta, and hanging out with your mates all make for positive climbing experiences.

Paul Cooke climbing “Johann” 6A+ on Lao Liang, Thailand (2017)


An effective redpointing process

  1. It all starts with picking the right route. To ensure you set yourself the right challenge it would be a minimum of two grades above your usual onsight grade. Another thing to consider is the location of your project; it is more convenient to have a project close to home or in an area that you can go to at least a few times a year. When the gaps in between ‘tries’ are too big, you are more likely to lose progress made in the previous session. Thirdly, a route with good conditions would be ideal; for instance in the Costa Blanca it is nicer to have a project with afternoon shade than one with morning shade, because by the time you have warmed up your project could be in the sun (climbing in the sun is not conducive for good results most of the year in Spain). Last but certainly not least, pick a route that grabs your attention. An outstanding line or feature. A route that you really want to climb. A route that you don’t mind doing over and over, because you just love the moves on it.
  2. Start climbing the route from bolt to bolt. If you can’t do a section in between bolts – or simply if you want to speed up the process and not waste too much energy, use a stick clip to clip the next bolt. In most cases, you can stick clip the whole route. Sometimes this may not be possible if the route goes over a bulge, or if a bolt is awkwardly placed and doesn’t allow the stick clip to get in. You can also use a stiff clip or panic draw to make it easier to clip the next bolt.
  3. Now you have the rope up, toproping the route can be useful. You need to be careful though not to overdo it. You will need to understand the clipping positions and how exposed the gaps between the bolts may feel when on lead.
  4. Lead the route bolt to bolt. Try to solve the puzzle section by section. When clipping the bolt, don’t say tight and wait for your belayer to take in. Instead, clip and let go (providing the fall is safe of course). This conserves energy rather than waiting for the rope to be taken in, and it is a useful falling practice at the same time.
  5. While bolt-to-bolting, avoid the temptation to do the easier sections too quickly, because in the end all energy saved lower down will help you in the crux. Work the route and its rests until it feels absolutely right for your body/physique, until you’ve ironed out all inefficient moves.
  6. Make sure to also repeat the section from the last bolt to the anchor! It is a common mistake people make to bolt-to-bolt every section many times, but then only do the finish once or twice, because they’re at the anchor now and think the bolt-to-bolting is finished. It is important to have those top moves wired; when bolt-to-bolting these moves may feel easy, but that could feel different when doing the route in a oner and arriving there completely pumped. You don’t want to fall off after all the cruxes and after pretty much having climbed the whole route, simply because you didn’t have the top moves wired.
  7. Before it is time to consider trying the route, proceed to combining sections until you can climb the route from ground to the first rest, from the first rest to the second rest, etc, until the clipping of the anchor. When in the rests, which are usually near a clipping position, ‘practice the rest’ but then have a proper rest on the rope. Don’t just rest on the rock as you would be if you were in your redpoint attempt. Be disciplined, even when it is starting to feel easier.
  8. A very important next step, and at the same time a good gauge of whether you are ready to start trying to send the route, is visualisation. Visualise yourself climbing the whole route, noticing every foot- and handhold, every rest and clipping position, every dynamic move, even where you will calm yourself back down by taking deep breaths. By the time you can visualise the whole route, you are very close to a clean ascent. Some people integrate visualisation with their meditation routine, or visualise just before falling asleep. It is also smart to visualise while you are getting ready to climb the route, and to continue visualisation while resting on the route. Visualisation is widely recognised as a very powerful tool in sports.

Climbing is a creative puzzle solving process that may require patience. A redpoint may take weeks or years. Adam Ondra for instance went to Flatanger 7 times in 2016 and 2017 for an average time of two or three weeks, and he reckons it took several hundreds of attempts before he climbed “Silence” (9C/5.15d).

Cheryl Law climbing “All Riggghht” 6B, Lao Liang, Thailand (2017)


A few years ago I coached Cheryl on her project, a beautiful >30m 6C in Thailand called ‘Family Affair’. We were both fully committed to her sending this route and the whole process was unforgettable for both of us. On every attempt, it was as if the whole world stopped, and it was just us there, silent, as if we were communicating through the rope. When she sent it, she said something that I since then like to remind myself and others of: She is a professional violinist and described the comparison of redpointing with studying a piece of music. When she first receives the music on paper it just looks like a jumble of notes, it looks impossible. Then bit by bit, line by line she starts to play the notes. Then she tries to play all the lines on the page. And she goes to the next page, trying to play every note. Until, after many hours of practice she is able to play the whole piece from start to finish. And, she said: and thát is when it starts! Because then you can play the piece again, but play it with feeling, play it the way it was meant by the composer. Not just as a succession of notes, but as a story. I love that analogy and feel that the same goes for climbing: there is a difference in climbing from hold to hold, and climbing as a dance up the rock.


Conclusion

Redpointing should be part of every climber’s training. It allows you to grow as a climber. It increases your movement repertoire, it improves your climbing grade, and it provides the opportunity to redefine ‘success’ and ‘failure’.

To those climbers who categorically avoid redpointing: it can easily be argued that red-pointing is easier than onsighting, both mentally and physically. There is the advantage of knowledge of the route. As opposed to onsighting, you know what’s about to come, you know the moves and how likely it is you are able to do them. You know that there are rests on the route and where and how good they are. You know where you are likely to fall off and what that fall will be like. Also, while practicing the route and working out the most efficient sequence in between every bolt, you’re only climbing from bolt to bolt and can then rest on the rope, to do the next section completely fresh, as opposed to onsighting where the pump may be building up. End the excuses: allow yourself to get the best out of yourself by (at least occasionally) engaging into a redpoint process.

If you would like to improve your climbing potential and learn how to redpoint you may want to consider joining Rock & Sun’s Performance Coaching Course. Most climbers come away from that week’s course having climbed two grades harder than they have done before, thanks to the combination of technique coaching and engaging in a redpoint process.

(written by Desiree Verbeek)

How to improve your onsight grade

How to improve your onsight grade

As climbing instructors we aim to contribute to positive climbing experiences. It is our goal to try and get the most out of people’s potential. An onsight close to your max is one of the most positive climbing experiences to be had. So this blog is all about How to Improve your Onsighting ability. Because let’s admit it: nobody likes blowing their onsight.


What is onsighting?

Onsighting is climbing a route “on sight”. This means that you climb a route without falling or resting on the rope, in your first attempt, without prior knowledge. Even watching a video online might negate the onsight.


Onsighting – a once in a lifetime opportunity

Onsighting is very special because you only get to have one go at it. If you fall, it’s over: you have ‘blown the onsight’. It is no longer and will never ever be an onsight again. (Unless you would like to call it an Alzheimer Onsight when you come back to the route years later and claim to have no recollection of it).

Every route in the world only has one onsight opportunity for each climber. As opposed to redpointing where the climber may need 10 attempts, or a 100, or where it may take the climber years of going back to the same route to practice it and get it completely dialled until they finally (if at all) get it done. The special thing about the onsight is that you only have one opportunity to get it. So you want to give it your full attention. You want to maximise your chances of performing well.

Another way to show the importance of onsight is that if you’re not careful you may run out of routes to onsight. This is most likely to happen in your local climbing area of course, especially if you are not giving it your all any time you set off on a new route. Personally, I deliberately save certain routes for when I am better equipped and more likely to get the preferable onsight experience (which for me is: climbing something that is just about doable but will take a lot of concentration, effort and puzzle solving). So, rather than toproping the route when someone offers me that opportunity, and rather than getting on lead on it just to try some of the moves, I’ll say no until I think I’m ready to give it a proper go.


Why Onsighting?

Climbing is puzzle solving, and onsighting may be the ultimate puzzle: the rock is the crossword, sudoku or 1000 piece Jigsaw puzzle, and you are the one to solve it, with all the tools and strategies you have available to you. Redpointing you can compare to being able to use the ‘crossword-dictionary’, or pencilling in some optional numbers in the sudoku before picking which one it is, or using the picture on the box to see what the Jigsaw puzzle will look like. When onsighting, you set yourself the challenge to solve the puzzle without any help, all by yourself, without mistakes (unless they are mistakes you can rewind, for instance by climbing back down to a rest).

Onsighting close to your max grade is a very rewarding experience; you’ll be fully consumed with the climbing, using all your skills to solve this puzzle. We all have memories of climbing and everything seemed to ‘flow’, where we were fully engaged with the rock, with the moves, and we lost all sense of time and surroundings, completely focused on climbing. We are most likely to experience this state of flow when the challenge of the route hits the exact sweet spot of your capabilities to climb it[i].

Another reason why many climbers prefer onsighting over redpointing, is that it can be a very positive experience: a successful onsight takes only 1 go, whereas a successful redpoint takes more attempts; i.e. the climb-success ratio is per definition higher. (That is of course if climbers measure ‘success’ as reaching the chains – which most climbers do). A climber can onsight 4 routes in a day, whereas it is highly unlikely to redpoint 4 routes in a day.


Improving onsight grade vs ‘normal’ climbing grade

How is Improving someone’s onsight grade different from improving someone’s climbing grade? This blog is not so much about improving your climbing skills (read our previous blog about Climbing Skill Sets here), and thereby improving your grade. What we mean with Improving your onsight grade in particular, is to get better at climbing a route without any previous knowledge of the route. Ultimately the aim is to get your onsight grade closer to your redpoint grade, and to have more of those ‘fully-engaged-flow-like’-climbing experiences.

Some people have a huge gap between what they can climb when they work a route and what they can climb without previous knowledge or experience of the route. This can be the case when choosing routes that are too easy for them, routes that are well within their max. Especially when on a climbing holiday (as opposed to climbing in their local area) many climbers prefer this, allowing them to climb as many different routes as possible. The onsight-redpoint gap can also be big for those climbers spending years on redpointing a certain route; their onsight grade is usually quite a bit lower than the grade they are trying to project.


Three main ways to improve your Onsight ability

  1. Route finding is crucial in onsighting. Most failed onsights are due to having gone the wrong way. As climbers, it is our job to find the easiest way to climb the rock. Make it any harder than necessary and you’re increasing the chance of getting into trouble, getting pumped, or even falling off. Route finding starts on the ground. From here, gather as much information as you can. Where is the anchor? Where are the bolts? Look at differences in the angle of the rock and any of its features that stand out. Where is it less steep? Where is it more featured? Spot any potential rests. Where do you think the crux or cruxes are – f.i. based on the angle of the rock and/or the bolts being closer together? Using a laser pen while doing this can help hugely so climber and belayer are talking about and looking at the same thing. The belayer can then remind the climber when going elsewhere than was decided from the ground[ii]. Please remember though that although on-ground-route-finding is crucial, that doesn’t mean that this is where it ends. While climbing you need to constantly ask yourself the question where the route goes. And it is also necessary to realise that you can downclimb. Climb up, get information about the holds, then climb back down to the rest, and then decide on your route to what you think will be the next rest.

An extra note to people with limited outdoor experience: the climbing does not necessarily go straight over the bolts; it is a ‘route’ and it is your job to find it. The bolts are there to help protect you from hurting yourself should you fall off, and to keep the rope in an as straight as possible line. You are free to go anywhere left and right of the bolts as long as it is safe to do so. “That hold is on the other route” is very much ‘indoor-climbing-speak’. Mother nature didn’t decide that certain edges belong to this or the other route. Even route setters don’t decide on this. Their aim is simply to create climbing and to make it as safe as possible.


  1. A deeply ingrained understanding of the basic movement pattern hugely helps when onsighting. It is important to understand what efficient movement is, and to easily recognise which moves to do given the holds available to you, wasting as little time and energy as possible. The more the principles of efficient climbing have sunk in, both in your thinking as well as in your muscle memory, the quicker you’ll see the correct crux sequence. When I get stuck at a certain section of the route, I know where to look for feet, and I can think ahead: for instance seeing a right handhold, I will look for a left foothold below it. Or when I want to release the low right foot, I automatically look for a left hand above my head and a push down for my right hand. It is consciously thinking about these things that will help you work out the crux sequences quicker, thereby saving energy. If you are not sure as to whether you fully understand the basic movement program, then we highly recommend to come on a Performance Coaching Course, and to be disciplined to keep climbing efficiently afterwards.

Besides a thorough understanding of efficient movement, what also helps to improve your onsighting ability is to increase the number of moves in your ‘climbing repertoire’, for instance by redpointing harder routes.


  1. Getting in the right mindset before stepping on the rock certainly increases your onsighting potential. We like to remind people that they have done their preparation, and that is now time to trust their capabilities and enjoy the process of going into the unknown. Trust the body’s capability to climb and at the same time be very determined. The mindset should be very different from when you’re warming up, or from when you are climbing a route you’ve climbed before, or from when you’re in the process of redpointing. When onsighting especially, you need to set yourself up for:
  • When it gets hard, I will fight harder. I will certainly not say “take”.
  • If I make a move that’s wrong and I can’t reverse it, then I will keep going and risk falling.
  • If I can’t find the technical solution to solve the crux, then I will do it ugly and waste energy. As long as I have been conserving energy on the easier sections of the route, I should be fine. Plus, I may be able to recover higher up the route. It is important to get the balance right between time spent on working out a technical solution and the energy spent while looking for that solution.

What can also help to increase your onsight ability is to do Fall Practice regularly. We want our brains to quickly move from assessing the risk of falling back to focusing on how to climb the next section of the route. Being able to be calm above a bolt means all your focus and attention can remain on the climbing task at hand. Any distractions such as a fear of falling divert part of the brain away from climbing which means you are less likely to succeed in the onsight.


What to do when you’ve blown the onsight?

Accept that you are not going to onsight every route you get on. (If you do, you are climbing below your max. and should be aiming to onsight harder routes). If you are choosing the right challenges for yourself, then you will sometimes fail and you should be prepared to fail. We think it’s a shame that many people walk away from a route when they failed to onsight it. Some do so because they are on holiday and don’t want to ‘waste’ more time on doing the same route again, when they could be climbing a new route. We understand that. But there’s also many people that don’t give it another try because they think they’re not good enough to climb the route. By not giving it a 2nd or 3rd attempt (basically a quick redpoint), they are essentially collecting failures, and missing out on a valuable learning opportunity. There are many gains to be had from turning ‘failures’ into success by redpointing a route. We will go deeper into redpointing in a future blog.

(written by Desiree Verbeek)

[i] For more information about Flow: Csikszentmihalyi, The Rock Warrior’s Way (Arno Ilgner), Hazel Findlay.

[ii] Our next blog will be about route-finding.

Climbing Skill Sets

Performance in climbing is a combination of three main skill sets. It is necessary to have these three aspects functioning optimally for your performance on the rock to be close to or at your maximum capability. Having these skill sets closely aligned will ultimately bring greater enjoyment and satisfaction to your climbing experience.

There is technique, understanding how to move efficiently on vertical ground. There is the mind, the ability to calm the mind down when it feels under pressure, the ability to deal with the natural fear of being off the ground. And then a climber’s physique, strength, power-to-weight ratio, and stamina (see Figure 1).

All three are coming together while climbing. You can’t just rely on your physique, power and stamina, nor just on having amazing technique, or on having a very strong mind. What we notice when we are coaching is that the climber’s performance can not exceed the level of the least developed skill. Let’s illustrate this.

Climber A has quite good technique, has got footwork and knows how to climb using as little upper body power as possible. When on lead, Climber A however finds they are often too scared to move above a bolt, to then fly up the same route when on a toprope; obviously not held back by the technical ability to climb the route. Climber A’s strength and fitness levels are high enough to climb harder. What is holding this climber back is a lack of skills to deal with mental challenges related to climbing. Getting fitter and stronger may make this climber feel more confident in being able to hold on to the holds, and it would buy time to figure out a technical solution for the crux, but ultimately this climber would benefit from exercises to train her mind.

Climber B on the other hand is a strong and physically gifted climber who is not so much distracted by fears. But with poor technique this climber is wasting a lot of energy, and therefore not climbing to their full potential. Mainly pulling on the holds and regularly dragging a leg behind on the easier part of the climb, means the climber is pumped when arriving at the crux of the route. Not held back by fear, Climber B slaps for the hold, makes it, but has no strength left to hold it and falls.

Climber C is a very experienced climber with close-to-being-perfect technique. With over 30 years of climbing experience, mainly trad, this climber has developed very good route-finding skills and is prepared to fall off on both trad and sport routes. Going out climbing regularly means Climber C has a good base level of fitness. But because they never trained specifically for climbing, physical abilities hold back their performance before anything else.

Climbing Skill Sets

Importance of the basics

Before we continue, there is obviously one more aspect to climbing: the basics. Getting the basics right is most important, and superseding all else. We regard the ability to assess risks, the skills to keep oneself (and your belayer) safe, and route-finding as the basics of climbing. You can be as strong, technically proficient or brave as you like, but if you can’t do a correct risk assessment, and/or don’t know how to keep yourself safe, and/or lack route-finding skills, you may get yourself into trouble.

People who lack the ability to keep themselves safe are the last people you would want to make more confident. They might get so casual with exposing themselves to unnecessary or serious risks that they could hurt themselves – or others. What they need first is to become safe climbers. At Rock & Sun we therefore pay a great deal of attention to safety. Initially we focus on clipping technique and positions, belaying, rope awareness, threading anchors, and risk assessments. There are many ways of doing these things and the important thing – especially for experienced climbers – is to keep your ears and eyes open for new developments and improved ways of doing the things you may have done a certain (possibly suboptimal) way for years or even decades. On the Rock & Sun YouTube channel we published several instructional/safety videos[i]. We also spend a great deal of attention to route finding skills – asking the question: “where is it less steep and more featured, from the feet up?” – practicing this for instance with a laser pen exercise[ii].

Once these basic principles are established, climbers can choose to train to get fitter and stronger, or to train the climbing brain, or to improve their climbing technique, or attempt to do it all.


Why we focus primarily on technique and efficient movement

We work closely with hundreds of climbers each year, we analyse their climbing, and dare to say that 90% of them are held back by their climbing technique. Some may think they are being held back by strength and fitness. Others may think that a fear of falling is holding them back. When we’re analysing climbers’ movement patterns, the reality is though that it is mostly people’s lack of understanding the biomechanics and how that affects efficient movement that is holding them back. This is compounded by a lack of route-finding skills. This is no surprise, as most climbers learn to climb in an indoor environment; they have limited time and opportunity to go outside and climb on rock. Climbing indoors, where routes are designed to get harder by putting the holds further apart and forcing the climber to use less than efficient movement patterns, means that when climbers come to climb outdoors they apply their ingrained (indoor) movement patterns on the rock, not recognising that easier options than the moves they choose are available. We will not go into too much detail here, but refer to our previously written articles on Outdoor Climbing Coaching, our video Inefficient vs Efficient Climbing, and to an example of our Video Analysis.


Fear starts in the forearms: Mind – Technique axis

Technique and the Mind are two linked skill-sets (see figure 1). Let’s illustrate this: When climbers lack technique, and lack understanding of where to look for footholds and how to execute moves, they will inevitably overuse their upper body. They will rely more on their arms for their upward movement than is strictly necessary. As a consequence, they are getting pumped quicker, and thát is the moment that the fear sets in: fear usually starts in the forearms. Plus, balancing on the rock face with only one foot is much more scary than moving up on both feet. Climbers rarely show fear when climbing above a bolt when they are on a route that is well within their grade – even though the consequence of falling might be more severe. So it is not necessarily their mind that is holding them back when climbing away from the protection. The mind usually becomes fearful when the climber is facing the prospect of falling, knowing they can’t hold on for much longer.

These climbers could choose to improve their climbing potential by working on their mental skills, but the root of the problem is their lack of understanding of how to move on vertical ground. Once they understand that – and are disciplined enough to reprogram their movement, they are saving upper body strength and it will take much longer before they get pumped – and scared. We reckon that most people we work with have at least two grades of climbing improvement in them, based only on improving their basic movement pattern.


Technique is an easy fix

A nice bonus of acknowledging that it is a lack of technique that is holding you back, is that it is relatively easy to fix. It is not rocket science; it is simple body mechanics. Once you understand the physics, and once you have received personal coaching to understand which bad habits you need to rewire, and have a set of drills that work for you to reduce your weaknesses, all it needs is discipline. As opposed to trying to improve your climbing by getting fitter to postpone the pump. How many people got into climbing because they love doing pull ups, push ups, and deadhangs?! Based on the climbers we work with on our courses and holidays (and on people we watch climbing while at the crag) we are convinced that most climbers do not need to do any additional physical training until they want to climb higher 7s.

Another good reason to focus on developing your movement skills instead of getting fitter and stronger, is that strength and fitness are easily lost during a period of not training or not climbing. After being ill or injured, pregnant, or a too busy period in your life where you did not have time to go climbing, your level of fitness and strength can be greatly reduced. Your technique however stays!


Fear is related to basic skill of doing risk assessments

Having described the link between technique and the mind, we now move on to explaining how someone’s ability to deal with a fear of falling is also strongly related to the basic required skill set of being able to do an accurate risk assessment. If physics isn’t your strong point, when doing your route finding (i.e. trying to find the less steep and most featured way to the next bolt, providing it is safe to go that way) all your options may come back as unsafe. “It is less steep and more featured on the left but if I go that way and fall off, I will swing into that feature there. The route definitely doesn’t go right here, because that’s looking too hard for the grade. I could go straight up here, where it is steeper and the holds are smaller than on the left. It keeps me closer to the bolt, but if I fall, I will land on the ledge I am leaving.”

It is completely normal (and sometimes even necessary) to be scared, because falling is not a natural thing for human beings to do. If you think you will hit something and hurt yourself, being scared prevents you from taking that risk. We should see fear as our friend. However, not being able to assess the angle, direction and length of the fall correctly, and assessing the risk as higher than it is, means you may be unduly scared.

Figure 2 helps to illustrate this. In a hypothetical situation, Climber D and Climber E are climbing the same 100 routes. Climber E always makes correct risk assessments: 20% of falls resulting in sustaining a serious injury, 10% of falls can be managed by f.i. deliberately pushing off while falling, and by an attentive and skilful belayer, and 70% of the falls are safe. Please note that the numbers are hypothetical – it should not be interpreted that if you do a correct risk assessment, 20% of the falls are in a “no fall zone”. Climber D however, on those same 100 routes, thinks that 80% of the time falling off would result in injury, and only 10% of the falls are safe. No surprise that Climber D feels scared.

Assessing fall zones

For Climber D it would be really helpful to make more accurate risk assessments. There are at least three easy ways to do this:

1) while on the ground, get into the habit of watching other climbers climb and imagine their fall if they were to fall off at any point, given the distance from the bolt and the amount of slack in the system. If at some point you assess the fall as not safe, ask a more experienced climber what their assessment of the fall would be.

2) while on the ground, watch other climbers taking falls. Was the fall what you had imagined it to be? This is especially helpful when a climber falls off the crux of a route that you are struggling to commit to. Once you’ve seen someone else fall in the same spot, your risk assessment can be adjusted.

3) while climbing and not willing to commit to a move because you assess it as possibly dangerous, ask your belayer how they assess the fall. Is it safe to commit?

Improving this basic skill set helps to be less scared, helps to calm the mind, and re-focus on the climbing.


Conclusion

To maximise your climbing potential, you need to assess (or ask a professional climbing coach to assess) what your weaknesses are and how these interrelate, in order to get the right exercises for you to improve. Work the weakest link! Work its true source, which may not be the same as how the weakest link manifests itself (remember that ‘fear from the forearm’ is most likely coming from a technical deficiency, not a lack of strength).

Based on several decades of experience with performance coaching for climbing, we conclude that most climbers need, first of all, to be able to make correct risk assessments, to know how to keep themselves safe, and to improve their route-finding, i.e. they need to get the basics right. Then, most room for improvement lies in learning how to move efficiently on vertical ground by understanding biomechanics and applying what we refer to as ‘a basic movement pattern’. As explained before, both of these have a positive effect on the mind. With correct risk assessments of fall zones, there is less reason to be scared. Knowing how to move efficiently saves upper body strength, which means you’re less likely to get pumped – and scared. Development of technique and the mind go hand in hand; by doing lots of mileage climbing easy routes the mind is calm and able to focus on efficient body movement.

When climbers have invested in improving their technique and in their basic risk assessment and route-finding skills, we consider training the brain as the best next choice of action. There are many exercises that help to stay calm and focused on the rock. We have worked together with Hazel Findlay on several occasions; she is a professional climber who specialises in coaching the mental aspects of climbing.

We do of course acknowledge that there is an advantage to being strong and fit. Looking at the Physique – Technique axis, stamina buys you time to figure out the most technical solution to a crux, and strength and power mean you have a greater selection of holds available to you. Furthermore, on the Physique – Mind axis, feeling strong enough to hold the holds, can give an advantage. It can calm the mind and help you to commit to a move. What we notice though is that most of our clients don’t lack strength or fitness.

(written by Desiree Verbeek)

***********************************************************

Interested in a Performance Coaching Course?

Keep an eye on our blog for our next article on Route-finding.

***********************************************************


[i] These videos are not intended to replace face to face instruction by a qualified climbing instructor, they are intended as refreshers for those having been on a Rock & Sun course or holiday.

[ii] Our next article will be about route finding, so keep an eye on our blog. We will accompany it with a video, which will be published on our YouTube Channel.

Outdoor Climbing Coaching

Recently the demand for outdoor sport climbing coaching has increased hugely. Due to the amount  of Performance Coaching Courses I have run I notice some patterns in the way climbers tend to move. Much of this might be down to the way we as humans naturally move on rock. It’s also possible that the nature of artificial climbing is playing a large part in forcing people into a pattern of movement that is at odds with the way you would ideally want to move on rock.

Having been a climbing instructor for over 30 years it seems that much has changed. Both physically and in the way people move. Clients are generally fitter and stronger, the grade they climb is generally higher than it used to be, but the gap between the grade people climb indoors compared to outdoors seems to be widening. What I find most interesting is seeing a well-established pattern of movement which is very similar from one climber to the next. Before climbing walls became popular, as a guide, you would most likely be introducing someone to climbing for the first time and they would therefore try to execute the moves and techniques that you explained as best as they could. These days however, the average client has already been climbing indoors for about two years and has a well-established pattern of movement.

When modern climbing gyms appeared on the scene in the early 1990’s they were very much seen as a place for climbers to train, build and maintain fitness during times of poor weather and the long dark winter months. But how well do they work nowadays for the new climber looking to progress outdoors?


The pattern of movement that climbing on artificial walls is likely to produce  

Climbing indoors likely develops a pattern of movement that is best described as: a high, often wide step (anything above the opposite knee is a good indication of what might be considered high), very little sideways movement of the hips if any, then pull on the arms before rocking over the high foot. This move is usually executed with a trailing back leg (a heavy limb weighing you down as you try to move up). This is about as inefficient a move as you can make.

Of course there comes a time when a high step rock over is necessary. However, if we are just doing so out of habit and missing the easier options when available we are unnecessarily wasting valuable upper body strength.


What makes us more likely to establish this pattern of movement when climbing indoors?

The limited options of foot placements on an indoor wall compared to rock as well as the difficulty in smearing on indoor routes can greatly reduce the opportunity to practice and develop basic non-technical movement skills. That is, if we choose to climbing the routes as they are set. In order to establish an efficient way of moving we need to understand what an ‘efficient basic movement pattern’ is.

When climbing outside, especially on the easier routes, an almost limitless number of foot placements options are available. Indoors however, in order to make routes harder, the holds will become fewer, smaller and placed further apart. Once a climber progresses through the grades they are often left with little option but to be climbing out of position (i.e. off balance) – with their feet much wider than the body’s centre of gravity and too high to be able to shift the hips sideways over the high foot in order to be balanced over the foot prior to the body moving upward. If this sideways movement does not happen it causes an over reliance on the upper body. When making the transition to the outdoors climbers are unnecessarily repeating these moves. They move in a way that their body has become accustomed to; high-step, pull with arms, rock over. The feet are moving past perfectly good foot holds to recreate a body position that feels ‘natural’. In reality it’s a bit more complicated than this but this is essentially how almost everybody is moving on the first day of a coaching course.


What might constitute a non-technical efficient climbing pattern?

Place your foot on to a hold. Then transfer the body weight onto the foot by moving the hips over the foot. It is possible to do this without the body moving up. In fact, if the body moves down as it moves sideways the arms can usually straighten. When fully balanced over the high foot, bend the knee of the opposite leg and use the hip joint to raise the leg and foot until it reaches the next foothold. All of this can be done without the hips moving in an upward direction. Now the body can be pushed up by straightening both legs; generating the upward momentum from the legs rather than pulling on the arms.


Climbing a ladder

I find the ladder analogy a good place to start when coaching outdoors. If the aim is to use the legs as much as possible protecting our weaker upper body then it might be useful to think about common terms we use to describe easy climbing such as: easy as climbing a ladder. What makes a ladder easy to climb? How would you design a ladder if you were going to make one?

The rungs would be close together below knee height and the width no wider than the hips. This way the feet are always directly underneath the body and never outside the width of our body. Making moves where our high foot is relatively low are easy to execute with minimal upper body strength. However as soon as we take our foot above the opposite knee pressing up from one leg starts to get hard so we tend to pull with the arms. The same is true when the foot is beyond the width of our body. If we don’t move our hips sideways over the high foot before lifting our back foot then our arms are holding a good percentage of our weight and we are therefore out of balance. Of course it is not always possible even when climbing on rock to keep your feet within the confines of a ladder but the more confident and skilful the climber is in their footwork, the more able they are to avoid being drawn out of position by bigger footholds that might not be best placed for transferring weight onto.

Having a non-technical movement programme allows us to focus on maintaining our form, and to easily recognise when we are choosing to go out of position and are no longer able to move our hips over the lead  foot. If we can recognise this we can more easily select the correct body position in order to execute the next move efficiently.


Analysing Movement Patterns

In the following sections I will be looking at how to analyse climbing movement and how to use the climbing gym effectively to develop efficient movement.

The motivation for writing these articles came about from coaching hundreds of clients who mainly climb or at least learnt to climb indoors. I was struck by how few of them understood any of the differences and how even those that had been coached assumed that what they had learnt indoors would help them climb on real rock.

Analysing a climbers movement pattern on an artificial wall can be difficult unless the climber is on a section of wall with an abundance of hand- and footholds (enough holds and easy enough grade that they are able to choose where they would like to place their hands and feet). The climber ultimately needs to be able to move freely and not be dictated to by spaced holds.

Filming climbers on easy routes, slabby or no more than vertical grade 3 to 5 even if they normally climb upwards of 7b, allows you to see how they naturally move when given a choice. If training mostly indoors and climbing the routes or problems as they are set, there is a risk of training our bodies to seek out the hard moves and overlook the easy ones. If we accept that climbing efficiently is important as a climber then we need to naturally seek out the easiest option. Of course, being able to execute hard moves is important but if our body naturally falls into familiar but unnecessary positions when on easy ground then we are wasting valuable energy. Climbing is a technical, balance based activity and executing moves when out of balance using the arms instead of the legs should be a last resort not the norm. I’ve coached many climbers in recent years who almost only do difficult moves, not seeing or considering an easier option as this would feel unfamiliar to them.

Once we understand what efficient movement is, we can choose to do a much greater percentage of climbing where we are not being dictated by the configuration of the holds. For example, if 80% of our climbing allowed us to move in a way of our choosing and we saw this as practice, we would have some quality control over how we move. If mostly practicing indoors this might involve climbing on sections of wall with many holds and using any colour for feet.


Based on efficient movement, what are we trying to observe?

I find it useful to start with transference of weight.

Is the climber fully moving the hips/centre of gravity over the leading foot? If not, why not?

Is the climber trailing the back foot as they move upward (climbers often arrive with a hole or wear mark on top of their shoes, this can be a giveaway), pushing from one leg rather than two?

Are they pulling on their arms or pushing from their legs?

  • Bent or straight arms?
  • Climbing dynamically or statically?
  • Making more hand movements/changes to foot changes?

There are many things that we can choose to look at when assessing how efficiently someone may be climbing. It’s best to keep it simple. It’s important to have the basics wired before moving on to anything more complicated.

Most if not all inefficient movement will be due to poor choice of foot- and hand holds. As good footwork is harder to develop it makes sense to concentrate more attention here.

The higher and or wider the leading foot is in relation to the back foot the harder it becomes to transfer weight onto it. Once the foot is above the opposite knee the leg is not strong enough to push the body up alone, so the arms need to help by pulling or pushing. For this reason, I begin with foot choices. If they are high, wide or both, I try to identify what techniques (if any) are being used to make upward movement as efficient as possible.

People are often surprised when they look nothing like they imagined on the screen. For most people it will be the first time they see themselves climbing. The fact that they are not flowing up the route with the grace of one of climbing’s greats can come as a bit of a shock!

It’s useful to have some positives to throw in with the analysis which if we are not careful can feel like a negative process (looking for things that the climber might be doing incorrectly or inefficiently). I must admit I’m pretty rubbish at this bit! I’ve learned that referring to how I know I used to climb before I took more of an interest in movement can help. But also looking at techniques the climber is using to compensate for being out of balance can help, as they are useful skills to have when climbing harder routes or features that require certain techniques. Watching how most climbers around them at the wall or crag will be moving with the same pattern is also useful.

From watching the video, it should be clear that if it is possible to take small steps, keep our feet close together then the climbing is naturally easier. Once the feet are outside the width of the body, sideways movement is necessary to move efficiently. The link below shows two climbers on the same route. The second climber is making good choices with the feet and displaying excellent technique.


How to make high or wide steps efficient

It is important to consider if poor footwork is the cause of us making poor choices with our feet in the first place. Often the inability to smear or stand on small edges is at play. When we must take our feet out of position, there are surprisingly few techniques that we might choose from:

  • Bringing our feet closer by stepping down with the high foot, bringing the back foot up a little before going back to the same highest foothold. Not really a technique; more away of avoiding the high step and remembering that this option often gets overlooked.
  • Cross over or through with the foot when going sideways.
  • Palming off or pushing down with the same hand as the foot we are going to move.
  • Dynamic rock over by bouncing off the back foot, generating movement from the legs to limit pulling on the arms.
  • Bringing the back foot up incrementally rather than in one big movement.

These options (apart from the dynamic rock over) should be made without upward movement of the body / hips.


Climbing is a discipline

Climbing is a discipline and like any discipline practice is necessary. Most climbers are self-taught and judge their expertise by the grade they climb, not necessarily by the quality of their movement. Most climbers just climb hoping or assuming they will get better. However, once we understand what efficient movement is, it becomes possible to self-coach. If we are present in the moment with each move we make and are prepared to fail seeking out the technical solution, rather than just pulling even if we know that we could, then we are practicing, and will make progress. Practice can only be done on routes easy enough to have both mental and physical space to consider each move.

By Trevor Massiah
This article was published in two parts in Professional Mountaineer Spring and Summer 2018

Interested in a Performance Coaching Course?
For more information and available dates, https://rockandsun.com/rock-climbing-courses/climbing-coaching/


[soliloquy slug=”costa-blanca-climbing”]